I used to think water damage was mostly a problem for old, drafty houses, not for homes full of sensors, Wi‑Fi, and automation. Then I watched a friend in Utah go from “look at my smart leak detectors” to ripping out half his basement after a main line break during a cold snap.
If you just want the short answer: in Utah, the smartest way to handle water damage is to mix basic building sense with tech. Use smart sensors, shutoff valves, and cameras to catch problems early, shut the water off fast, and document everything. Then move quickly on three tracks at once: stop the source, start drying within 24 hours, and get a local water damage restoration Utah pro involved if anything looks bigger than a small spill. The tech will not fix soaked drywall by itself, but it will help you act sooner and make insurance a lot less painful.
Why smart home people should care about water damage in Utah
If you like tech, you probably think about smart locks, cameras, or voice assistants first. Water damage sits in the boring category. Until it does not.
Utah homes face a strange mix of risks:
– Dry climate most of the year
– Sudden snowmelt and heavy rain during some seasons
– Older plumbing in many neighborhoods
– Frozen pipes in winter, especially in basements and vacation homes
That combination creates short, intense water events. A pipe bursts, a water heater fails, or an irrigation line leaks into a basement. Your gear, server racks, network closet, entertainment center, all sit low to the ground. Guess where water goes.
If you keep thousands of dollars of gear a few inches above a concrete slab, water damage is not just a home issue, it is a tech issue.
The goal is simple:
– Get notified faster than your floor can soak up the water.
– Cut the water supply without guessing.
– Decide quickly what you can handle yourself and what needs professional help.
– Keep proof for insurance without digging through your phone for random photos later.
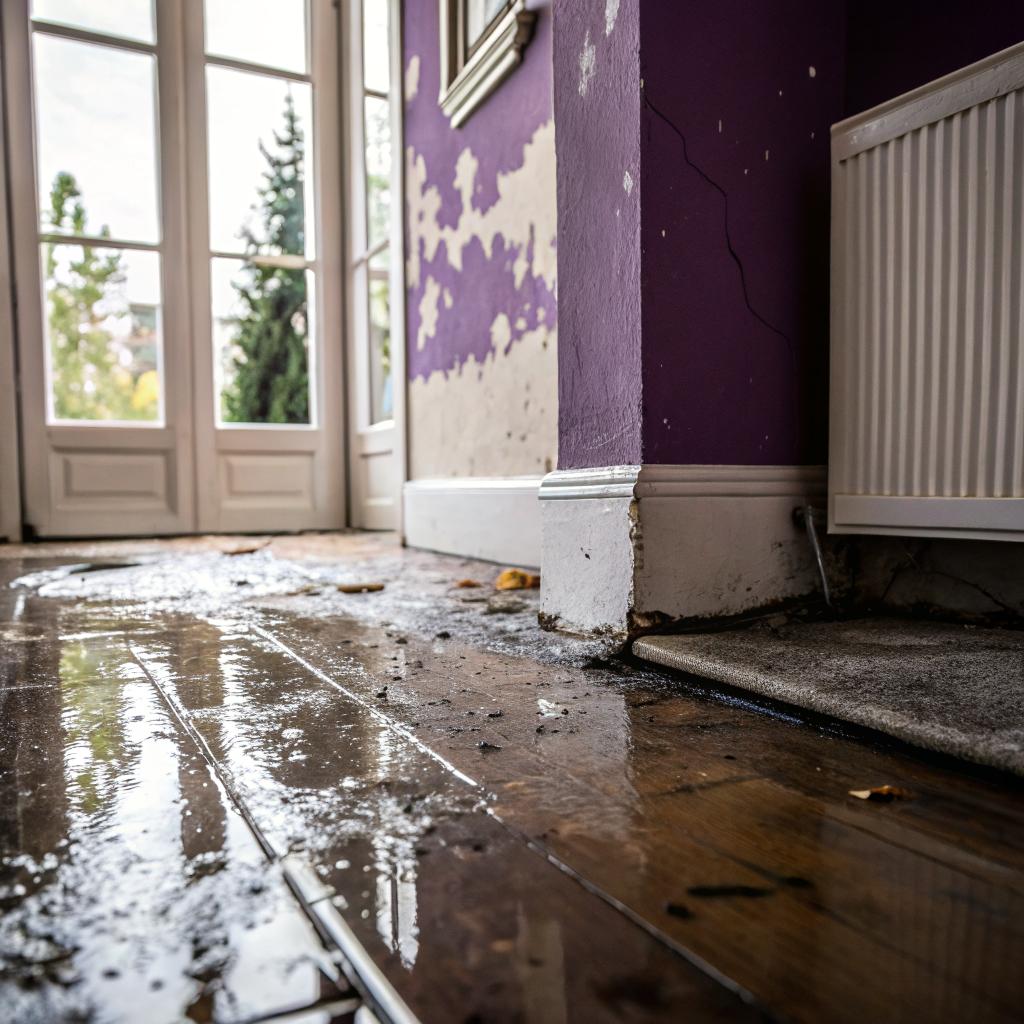
How water behaves inside a modern home
Water in a house does not stay put. It moves in ways that surprise people.
A small leak under a dishwasher can:
– Wick sideways through subfloor
– Travel under vinyl or hardwood
– Show up as a stain five feet away
– Spread into wall cavities you cannot see
In Utah’s dry air, people sometimes think, “It will dry on its own.” Sometimes it does. Sometimes it dries on the surface while the inside stays wet and grows mold quietly.
For a tech minded person, it may help to think of water damage like hidden packet loss on a network. The system still “works” at first, but things degrade slowly. By the time you notice, the underlying issue has grown.
Common sources of water damage in Utah homes
Here are the typical failure points in Utah houses, based on what local restoration companies keep seeing again and again.
- Frozen and burst pipes in winter
- Washing machine hoses and valves
- Dishwashers and fridge water lines
- Water heaters (tank failures and slow leaks)
- Basement seepage after heavy rain or snowmelt
- Roof leaks around vents and skylights
- Backed up floor drains or sewer lines
If you run lots of tech, pay special attention to:
– Utility rooms where water heaters sit next to racks, UPS units, or network gear
– Finished basements used as media rooms or home offices
– Under‑desk areas where power strips and PCs sit on the floor
A tiny pinhole leak above a network rack can do more damage than a visible puddle in the middle of the floor, because you will not see it until it drips onto electronics.
How long you actually have before things get bad
Rough timeline, assuming clean water from a supply line:
| Time after leak starts | What usually happens |
|---|---|
| First 1 to 4 hours | Water spreads into flooring and lower walls, but materials can often be salvaged if drying starts quickly. |
| 24 to 48 hours | Materials like drywall and insulation stay wet; mold can begin growing, especially in dark wall cavities. |
| 2 to 7 days | Structural elements may start to weaken; odors increase; clean water can become “grey” water with bacteria. |
| 1 week and beyond | Extensive removal often required; higher chance of mold remediation and major repairs. |
So the “I’ll get to it this weekend” mindset can be very expensive.
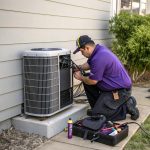
The smart home toolkit for preventing water damage
If you love smart home gear, the prevention side is actually the fun part. You get to play with hardware and automations that might save you from a big bill later.
1. Smart leak sensors and where to put them
Battery powered leak sensors are cheap compared to one restoration ticket. The trick is placement, not just buying the popular brand.
Put sensors:
– Under every sink
– Behind or under dishwashers and fridges with water lines
– Next to toilets
– Beside the water heater
– Near washing machines
– At low spots in the basement, especially near floor drains and main water lines
If you run a server rack or network closet:
– Put one sensor at the lowest point on the floor
– If possible, put another above the rack to catch drips from pipes or HVAC lines
Connect these sensors to your hub or Wi‑Fi. Set alerts to:
– Push notification to your phone
– Sound an alarm on a smart speaker
– Flash certain smart lights red so you notice quickly
For out of town owners or vacation homes in Utah, leak sensors are almost mandatory. Frozen pipe season does not care if you are out skiing somewhere else.
2. Smart water shutoff valves
A smart main shutoff valve is one of those devices that feels boring until it saves your entire basement.
You can:
– Install a motorized valve on the main line
– Connect it to your smart home hub or vendor app
– Link it with leak sensors
Typical rules:
– If any leak sensor triggers and you are “away”, shut off the water
– If a specific high risk sensor by the water heater triggers, always shut off
There is a tradeoff. Automatic shutoff can cause inconvenience, like stopping a running shower or laundry mid‑cycle. But that is much easier to live with than four inches of water.
If you are not ready for a full automatic setup, at least pick a valve model that you can close from an app. Then you do not have to call a neighbor and try to explain where the main shutoff is over the phone.
3. Smart sump pumps and basement monitoring
Some Utah homes use sump pumps, especially in areas with higher groundwater or near slopes. You can:
– Add a smart outlet or direct Wi‑Fi pump with alerts
– Use a sensor in the sump pit to track unusually high levels
– Set alerts for pump power loss
Smart plugs with energy monitoring can show if your pump has stopped running when it should be working.
4. Cameras used the right way
Indoor cameras are not a water device, but they can help when there is an event.
Use them to:
– Check basements and utility rooms while you are away
– Confirm if an alert from a leak sensor is real or a false trigger
– Document the scene for insurance before anyone starts cleaning
One caution: do not rely only on cameras for detection. By the time water is visible on most camera placements, it has probably been leaking for a while.
What to do in the first hour after you find water
This is the part most people get wrong. They either panic and do almost nothing or rush in and make things worse.
1. Kill the risk to people and electronics
Before you worry about saving furniture or walls, think safety.
– Turn off electricity to flooded areas if water is near outlets, power strips, or electronics.
– Unplug gear on the floor. Do not stand in water while touching anything electrical.
– If water is dripping near a breaker panel, stop and call a pro. Do not touch it yourself.
For your tech:
– Power down PCs, servers, consoles in the affected zone.
– Move hardware to a dry floor or upstairs room.
– Keep hard drives and NAS units high and dry, even if they are “water resistant”.
Data is usually more valuable than drywall. Treat your drives and backups like the first things to protect once people are safe.
2. Stop the source fast
If a supply pipe is leaking:
– Close the main water shutoff
– If you have a smart valve, trigger the shutoff in the app
– Open a couple of faucets to relieve pressure and drain lines
If it is from roof or foundation seepage during a storm:
– You may not be able to stop the source completely
– Focus on redirecting surface water away from the foundation with temporary measures
– Call a roofer or drainage pro once immediate cleanup starts
If it is a sewage backup:
– Do not handle it like normal water
– Avoid contact, especially with children and pets
– This is usually a direct call to a restoration crew and possibly a plumber
3. Document before you start major cleanup
Grab your phone and take:
– Wide shots of the whole area
– Close shots of damaged items and standing water
– Photos of walls, baseboards, and the water line on furniture
Make a quick video walking through the space and talking through what you see. It may feel silly but it helps later when you speak with adjusters or contractors.
DIY vs professional water damage restoration in Utah
This is where people often guess. Tech owners sometimes lean toward DIY because they already like solving problems. That helps, but it can also cause overconfidence.
Here is a basic way to think about it.
| Situation | DIY possible? | Professional needed? |
|---|---|---|
| Small, clean water spill on hard flooring, dried within a few hours | Yes, usually | No |
| Soaked carpet in one small room, caught quickly | Maybe, with rental fans and dehumidifier | Helpful, but not always required |
| Water inside walls or under cabinets | Partially, but hard to fully confirm dryness | Recommended |
| Multiple rooms affected, water standing for more than 24 hours | Not a good idea | Yes |
| Water from sewer, drain backup, or outside floodwater | No | Yes, due to contamination |
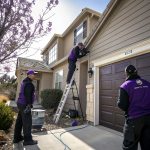
Utah has quite a few restoration companies, especially around the Wasatch Front. Many of them also understand local building styles, like finished basements with shared walls and mechanical rooms tucked into small corners.
What a professional restoration crew actually does
If you have never seen it, it is more methodical than dramatic.
Typical process:
1. Assessment
They use moisture meters and thermal cameras to find hidden wet spots in walls, floors, and ceilings.
2. Water extraction
Pumps and high power vacuums remove standing water and water stuck in carpets or padding.
3. Controlled demolition
They remove baseboards, drill small holes, cut out soaked drywall where needed, and take out ruined insulation or flooring.
4. Drying
They place dehumidifiers and air movers based on measurements, then adjust placement for a few days until readings hit target levels.
5. Cleaning and treatment
They treat surfaces to reduce mold risk and remove odors.
6. Documentation
They often take photos, readings, and notes that help with insurance claims.
For a tech heavy home, you can also ask them to be careful around cables and low voltage lines. Some are more willing than others to work around your setup instead of ripping things out blindly.
How your smart home gear can help with insurance
This part gets overlooked. If you end up filing a claim, your devices are not just victims, they can be witnesses.
1. Timestamps and notifications
If a leak sensor alerted you at 3:12 PM and you shut off the smart valve at 3:15 PM, that timeline can matter. It shows you acted quickly.
You can:
– Screenshot app alerts
– Export event logs from your smart hub if it allows
– Share notification histories with adjusters to back your story
2. Video proof
Camera footage can:
– Show how much water there was at the start
– Prove that you did not cause intentional damage
– Support estimates about what got wet and for how long
Store key clips in cloud storage or a backed up NAS. Losing recordings because they lived only on a local NVR that got soaked is a very annoying kind of irony.
3. Inventory of damaged tech
You probably track some of your gear already. For water claims, it helps to:
– Keep a simple spreadsheet of major electronics with model and purchase date
– Store receipts or order confirmations in a shared drive
– Take photos when you set up a new device in your rack or entertainment center
After a water incident, you can quickly pull a list of affected items instead of walking around the damp room guessing what used to be where.
Utah specific factors: climate, seasons, and building quirks
Water damage in Utah is shaped by a few local realities that matter more than people think.
1. Dry air is not a magic dryer
The low humidity helps once you start controlled drying, but it does not fix:
– Trapped moisture inside walls
– Wet insulation
– Water behind vapor barriers or under tile
You still need:
– Adequate airflow
– Dehumidifiers
– Time
Opening windows on a dry day can help a little, but not enough on its own for deeper moisture.
2. Freeze and thaw cycles
Pipes in:
– Exterior walls
– Unheated garages
– Crawlspaces
– Vacant vacation homes near ski areas
can freeze and burst. Smart thermostats help, but only if you:
– Keep minimum temperatures reasonable
– Set alerts when temperature drops too low
– Combine them with leak sensors in risky areas
If you turn heat very low to save energy, you increase burst risk. There is a balance between utility bills and repair bills.
3. Finished basements and grading
Many Utah homes rely on basements for living space. They are also the first to take on water from:
– Surface runoff sloping toward the house
– Poor window well drainage
– Sprinkler systems overspraying near foundation walls
Check:
– Gutters and downspouts
– Soil slope around the house
– Your irrigation schedule and spray pattern
Then treat any finished basement with the same care you would give the main floor. It is not “bonus space” when your best gear lives there.
Protecting home offices, servers, and entertainment gear
If you work in tech or just enjoy it, your highest value items probably sit low and wired.
1. Raise and separate
Small changes make a big difference:
– Put desks, racks, and cabinets on small risers or feet
– Use wire shelves or raised platforms in basements to keep gear off the slab
– Keep power strips mounted above floor level on walls or desk undersides
Water usually stays low. Even a one inch lift can save hardware.
2. Rethink cable management
Neat bundles along the floor look nice until they soak up water.
Try:
– Running cables along walls, but not resting on the floor
– Using cable trays under desks that sit a few inches above floor level
– Labeling cables clearly so if a section gets wet, you can replace it without tearing everything apart
3. Backups that assume bad things happen
For water events, local redundancy is not enough if everything sits in the same room.
Consider:
– Cloud backup for core documents and photos
– One offsite or out of room backup for the most important data
– A small waterproof case for bare drives or backup media stored on a higher floor
It is not paranoid. Water, fire, or theft all hit local hardware the same way.
Working with a Utah restoration company in a smart way
If the problem clearly needs a professional, the way you interact with them can shape both the repair and the insurance outcome.
Questions to ask before you say yes
- How fast can you get here?
- Do you work with my insurance company often?
- Can you share moisture readings before and after drying?
- Will I have one contact person or several?
- How do you handle electronics that were exposed to moisture?
Ask them how they feel about you using your own tools too. Some tech owners like to run their own sensors or loggers. Many pros are fine with that, some less so.
What you should track during the process
Keep:
– Daily photos of progress
– Copies of invoices and work orders
– Moisture reading reports if they provide them
– Notes on items removed or discarded
You can use a shared folder in your cloud storage and drop everything in one place. If you live with other people, ask them to add photos there too. Different angles catch different details.
Smart automations that actually reduce risk
Some automations are more useful than others. It is easy to get lost in clever rules. Instead, focus on a few that directly reduce water risk.
Automation ideas that are worth the time
- Leak detected near water heater → close main valve → send phone alert → flash basement lights.
- Low temperature detected near pipes in winter → send high priority alert → raise thermostat slightly if no one is home.
- Power loss detected at sump pump outlet → send alert → sound audible alarm upstairs.
- Unexpected high water use (if monitored) while no one is home → alert and suggest checking cameras or sensors.
You do not need dozens of rules. A small number of clear, high value automations beats a complex stack that you stop trusting.
Common mistakes tech people make with water damage
There are some patterns that keep repeating, especially with homeowners who feel confident with systems.
1. Trusting sensors too much
If a leak occurs in a spot with no sensor coverage, your setup does not help. Think about:
– Vertical leaks behind walls
– Roof leaks that come down into a corner
– Exterior irrigation lines
Use sensors as one layer, not the only layer.
2. Assuming equipment survived because it still turns on
Electronics that got partial water exposure may:
– Work for a while
– Corrode internally
– Fail later, sometimes in dangerous ways
For anything that sat in standing water or got visibly wet inside, get a repair opinion or plan to replace it. Do not keep high power devices in service if they had water inside them.
3. Starting fans without dehumidification
Pointing fans at wet surfaces with no way to remove moisture from the air can:
– Spread damp air into other rooms
– Condense moisture in different places
– Slow overall drying
Rental or owned dehumidifiers are more effective than just “lots of air movement”. Professionals use both together for a reason.
Preventive maintenance that is not very exciting but works
This is the unglamorous part, but tech people usually handle checklists well.
Regular checks to put on your calendar
- Inspect washing machine hoses every 6 to 12 months; replace rubber hoses with braided ones when they show wear.
- Check under sinks for any dampness or stains; run your hand along pipes while water flows.
- Look at your water heater for rust, bulging, or small puddles; many tanks fail around the 8 to 12 year mark.
- Clean gutters and downspouts before winter and after major storms.
- Test your sump pump once or twice a year by pouring water into the pit.
- Review smart alerts to make sure they actually notify you on devices you use now, not an old phone.
None of these take long. Together, they lower risk more than one extra fancy sensor.
What if you rent or live in a condo?
You still have options, though some are different.
For renters
You can:
– Use portable leak sensors under sinks and appliances
– Add a small personal dehumidifier if your place is prone to dampness
– Document any leaks quickly and send written notice to the landlord
– Carry renter’s insurance that covers water damage to your belongings
Just be careful about installing anything on main water lines without permission.
For condos and townhomes
Water can travel between units, which complicates everything.
Helpful steps:
– Learn where shared shutoff points are
– Put sensors near shared walls and under any HVAC units
– Join or at least pay attention to HOA communication about plumbing issues in the building
When a neighbor’s line floods your place, your documentation and early alerts may be the key to proving how and when it happened.
Q & A: Common questions from tech minded Utah homeowners
Do I really need a professional if I have a shop vac and fans?
For a small spill caught quickly on hard floors, probably not. For anything that soaked carpets, walls, or insulation, you usually cannot confirm what is dry and what is still wet inside. Pros bring tools and experience that most of us do not have, and in larger cases they actually help protect your insurance claim.
Are smart water shutoff valves worth the cost?
If you travel often, own a second home, or just have a finished basement with gear, the cost of one decent valve is tiny compared to one mid‑size water loss. In those situations, I think they are worth it. If you live in a small place, are always home, and have quick access to the main shutoff, it is more of a comfort feature than a clear need.
Can I rely on Utah’s dry air to handle minor leaks without equipment?
Sometimes yes, for very small spills on tile or vinyl that you clean up right away. But for anything that soaked into porous materials or went under walls, the dry climate does not change the basic physics. Trapped moisture still needs proper airflow and dehumidification or it can cause long term problems.
What is the smartest single upgrade to reduce water risk?
If I had to pick just one, I would start with a small group of well placed leak sensors tied into a reliable alert system. They are cheap, they do not require plumbing work, and they turn hidden leaks into visible events you can act on. After that, a smart main shutoff is the next strongest step.
Is there a perfect setup that guarantees no water damage?
No. You can lower risk a lot with smart gear, basic maintenance, and quick decisions when something goes wrong, but you cannot remove it completely. The aim is not perfection, it is to turn a potential disaster into an annoying repair. If your tech setup survives and your house stays healthy, that is a win, even if there were still a few wet towels involved.