I used to think water damage was mostly about drying carpet and maybe running a fan for a few days. Then a pipe burst in a smart home I was house sitting, and I watched in real time as sensors screamed, apps lit up, and still, water quietly soaked into places I did not even think about.
If you are dealing with a leak or flood in Salt Lake City, the short answer is this: shut off the water, cut the power in the affected area, protect your devices, and call a local pro that handles 24/7 water damage restoration Salt Lake City. Smart home tech can help you react faster and document the damage, but you still need physical drying, cleanup, and repairs to avoid mold and structural problems.
Why water damage in a smart home feels different
When you pack your house with sensors, hubs, speakers, routers, and battery backups, water is not just an annoyance. It threatens:
- Your wiring and electrical panels
- Your servers, network gear, and routers
- Your smart speakers, TV, consoles, and PCs
- Your walls, floors, cabinets, and insulation
- Your indoor air quality because of mold risk
Salt Lake City adds a few local twists. You get snow in winter, spring runoff, summer monsoon storms, plus the dry climate that can trick you into thinking “it looks dry, so it must be fine.” It is often not fine.
On the other hand, a smart home can give you an edge. You can catch leaks early, shut valves remotely, and capture data that helps your insurance claim. That is the part that interests most tech minded people, and honestly, it is the one part of the story that feels a bit optimistic.
First hour: what to do before anything else
The first hour after you see water is where tech and old fashioned manual work meet. If you skip the basics, the nicest sensor setup in the world will not save your subfloor.
1. Stop the source and make it safe
If you remember nothing else, remember this:
Stop the water, then make the area safe, before you worry about your gear or your data.
Steps that usually make sense:
- Find and close the main water shutoff valve. In many Salt Lake homes this is in the basement, mechanical room, or near the water heater.
- If you have a smart shutoff valve, trigger it in the app. Then still go and check it physically. Devices fail.
- Turn off power to affected rooms from the electrical panel if outlets, power strips, or devices are wet or sitting in water.
- Do not walk in water if you suspect live electrical circuits are involved. This is one place where caution matters more than saving a laptop.
It sounds boring, but I have seen people skip the power step because they want to rescue a PC. That is a bad trade.
2. Protect your tech, but do it in the right order
Once you control the water and power, then you can think about devices.
Short version:
- Unplug and move anything electronic that is still dry in the affected rooms.
- Lift power strips, extension cords, and UPS devices off the floor.
- Move smart speakers, hubs, routers, and PCs to a dry area on a higher floor if you can.
- Do not power devices back on until a pro or a repair tech checks them if they got wet.
If you keep a NAS or home server in the basement, this is where you either feel very smart (if it is on a rack away from the floor) or slightly annoyed with yourself.
Treat any device that has been splashed or submerged as “off limits” for power until it is fully dry and inspected.
Rice will not fix a flooded smart thermostat or a soaked router cabinet. That is a myth that refuses to die.
3. Use your smart home to help you, not distract you
Your first reflex may be to jump into apps and check everything. I think that can help, but it can also waste time if you let it.
Helpful uses of your tech at this stage:
- Check leak sensor history to see when the problem started. This can narrow the timeline for insurance.
- Review security camera footage to confirm what failed first. Did a pipe burst, did a washer hose disconnect, did a sprinkler line freeze?
- If you are away, use cameras and sensors to decide whether you need a neighbor or pro to enter now or if it can wait a bit.
- Use your smart thermostat to switch HVAC off in affected zones if vents or ducts are wet.
Less helpful uses:
- Spending 40 minutes trying to reconnect a hub that lost power while the carpet is soaking.
- Fighting with notifications while you still have an active leak.
Tech should support the physical response, not replace it.
What water actually does to a smart home
People sometimes treat “water damage” like a single thing, but it is really several overlapping problems. Some are about physical materials, some about air, some about electronics.
Here is a simple way to think about it.
| Area affected | What water does | Risk for smart homes |
|---|---|---|
| Flooring & subfloor | Soaks in, swells, warps, grows mold | Damages floor outlets, low wall outlets, baseboard sensors |
| Walls & insulation | Holds hidden moisture, feeds mold | Harms in wall wiring, smart switches, low voltage runs |
| Ceilings | Leaks, stains, sagging drywall, possible collapse | Impacts recessed lights, ceiling speakers, access points |
| HVAC & ducts | Spreads moisture and spores through air | Contaminates vents, sensors, and air quality devices |
| Electronics | Short circuits, corrosion over time | Failures that can be delayed weeks or months after the event |
This is where professional restoration companies earn their fee. They do more than vacuum water. They open cavities, measure moisture in different materials, and dry things in a controlled way.
Dry on the surface does not mean dry inside. The real danger sits behind drywall, under flooring, and in insulation.
If you care about your network wiring or that clever hidden speaker install, you want those spaces dry for real, not just “feels dry to the touch.”
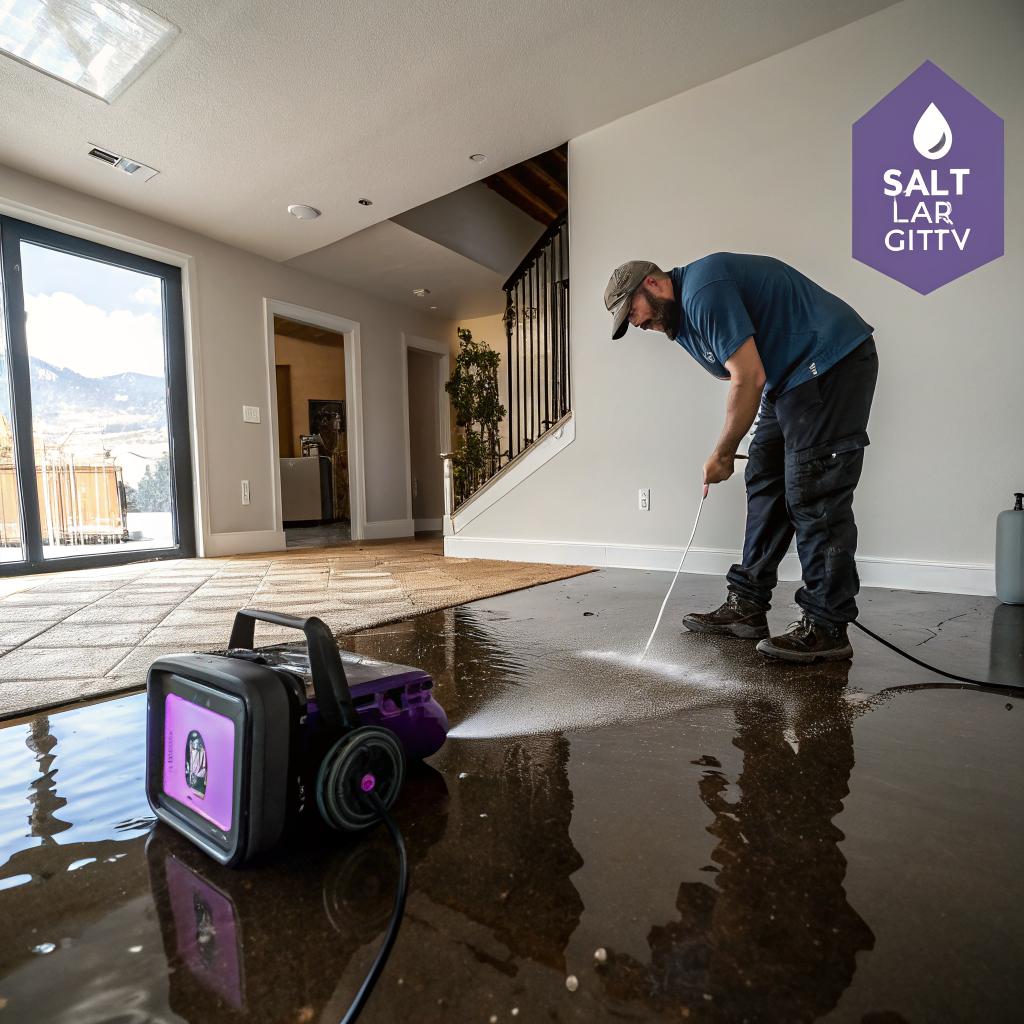
How pros tackle water damage in a tech heavy home
If you have never seen a full restoration job, it can look a bit chaotic at first. Fans, dehumidifiers, plastic sheeting, cords everywhere. Underneath that, there is a clear process, and it helps to know what is happening so you can plan around your smart devices.
Assessment and moisture mapping
A good crew will not rush straight to ripping carpet. They usually:
- Walk the property to see the obvious damage.
- Use moisture meters on walls, floors, and trim.
- Check ceilings below any visible leak.
- Identify “wet zones” that might not be visible yet.
- Ask you about any sensitive electronics or server areas.
If you have structured wiring, wall panels, or a dedicated rack, show them. In my experience, tech owners sometimes hide the server closet because it is messy. That is the worst thing you can do in this context.
Water extraction and demolition
Next is getting bulk water out and removing materials that cannot be saved.
Typical steps:
- Use pumps or wet vacs to remove standing water.
- Pull up saturated carpet and padding if it cannot be dried thoroughly.
- Remove baseboards and cut out sections of drywall to open wall cavities.
- Bag and remove debris that could harbor mold.
This is noisy and disruptive. Your network and smart platform will likely go down in the affected area. It might be a good time to:
- Shut down nonessential smart automations so lights are not flipping on and off during work.
- Temporarily move your hub or router to a safe, dry location.
- Label and disconnect any wall mounted tablets or PoE devices in the demo area.
Drying, dehumidification, and monitoring
After removal comes controlled drying. This is less dramatic but arguably more technical.
Pros will:
- Place air movers to push air across wet surfaces.
- Run dehumidifiers sized for the volume of air.
- Protect unaffected areas from moisture with plastic barriers.
- Check moisture levels daily.
Timeline depends on:
- How long water sat before anyone noticed
- Temperature and humidity inside the home
- How deep the water penetrated into materials
Salt Lake’s dry climate helps a bit, but indoors you still create a mini climate of moisture during this stage. It is not instant.
For a smart home, this is when you can start:
- Reviewing which devices survived and which need repair or replacement.
- Documenting damage for insurance with photos and app screenshots.
- Planning wiring changes or upgrades while walls are open.
Cleaning, sanitizing, and mold prevention
Even “clean” water from a burst supply line can become contaminated once it soaks into building materials. If grey water or sewage is involved, the risk is greater.
Standard practice often includes:
- Antimicrobial treatments on affected surfaces.
- HEPA vacuuming of dust and debris.
- Filter replacements in HVAC systems.
For people who care about indoor air quality sensors, this is a useful time to:
- Check your AQ devices in the affected area for accuracy afterward.
- Log changes in humidity and VOC readings during and after work.
Not because you need to obsess over every data point, but because long term mold problems often show up as subtle humidity patterns before anyone smells anything.
Repairs and rebuilding
Only once moisture readings are back to normal does it make sense to rebuild.
This usually includes:
- New drywall, texture, and paint.
- New flooring and baseboards.
- Cabinet and trim repairs.
This is also where your smart home brain can get creative:
- Run extra conduit or low voltage cabling while walls are open.
- Install better placed leak sensors and smart valves.
- Reposition outlets and network drops to keep equipment off the floor.
In a way, water damage is a forced renovation. Unpleasant, yes, but it gives you access you normally do not get.
Using smart home tech as your early warning system
This is the part most tech fans care about. How do you use sensors and automation so that a small leak does not become a major restoration job?
Leak sensors: where they actually help
Simple leak sensors are inexpensive and boring, but they are probably the single best gadget for this problem.
Good spots for them in a Salt Lake City home:
- Under sinks in kitchens and bathrooms
- Behind toilets and near tub overflows
- Next to the water heater and softener
- Near washing machines and dishwashers
- Under fridge if it has a water line
- At the lowest point in the basement where water tends to collect
For each sensor, think about:
- Who gets the alert
- On which device
- What time of day
An alert on your phone is great until you are on a flight with no data. You might want:
- Push notifications for you
- Text for a partner or roommate
- Maybe an email for logging
You can also tie leak alerts to actions:
- Flash certain smart lights red when a leak starts.
- Announce through smart speakers that a specific sensor has triggered.
- Pause the washing machine or dishwasher via a smart plug if you use one.
Nothing is perfect, but even a simple ping at the right moment can shave hours off your response time.
Smart shutoff valves and automations
Smart water shutoff valves sit on your main line and let you close water from an app or automatically.
Common use cases:
- Shut the main valve when any leak sensor trips.
- Auto shutoff if abnormal continuous flow is detected.
- Remote shutoff when you leave on a trip.
There is a tradeoff though. Full automation can cause false triggers. I know one person whose washing machine startup kept tripping their “abnormal flow” rule, so their valve would close mid cycle. They almost gave up on it.
You might prefer a softer approach:
- Leak detected → strong alert on phone and speakers → manual confirm to close valve.
It is less automatic but still way faster than driving home and turning a rusty handle behind some boxes.
Cameras and occupancy sensors
Cameras do not stop water, but they help with context.
Uses that make sense:
- Point a camera toward the basement floor or sump area to check visually when a sensor triggers.
- Use occupancy sensors to know if anyone is home to react.
- Record short clips when leak sensors trip so you can show when water first appeared.
Insurance claims sometimes go smoother when you have timestamps and visual proof instead of vague guesswork.
What data matters afterward
Tech people tend to collect data for its own sake. In this case, a few things are actually practical:
- Leak event timestamps from your hub or platform.
- Indoor humidity levels before, during, and after the incident.
- Temperature logs for the area where a pipe froze, if that is the cause.
You can share that with:
- Your restoration company, so they know how long water sat.
- Your insurance adjuster, to help explain cause and timeline.
- Your plumber, to understand pressure and freeze risks.
Not all pros will care about your graphs, but many are starting to. And at the very least, it gives you a clearer picture when you decide what to change.
Salt Lake City specifics: weather, basements, and water sources
Water problems in coastal cities look different from those in the Wasatch Front. Salt Lake has its own pattern.
Common sources of water damage here:
- Frozen pipes during cold snaps, especially in exterior walls and unconditioned spaces.
- Spring thaw combined with clogged gutters and poor grading.
- Summer thunderstorms that push water into window wells and basements.
- Old supply lines to swamp coolers or sprinklers.
Basements magnify everything. If yours is finished, you have a lot of material and wiring at risk.
Smart home tweaks that fit this region:
- Place leak sensors near window wells and basement doors.
- Monitor outdoor temperature where pipes are exposed and alert if it drops near freezing.
- Use cameras to keep an eye on flat roofs or known problem areas during storms.
- Check sump pump status with smart plugs or current sensors if you have one.
Salt Lake’s dry climate does help long term drying, but it can also give a false sense that “mold is not a big deal here.” It still grows inside walls and under floors where humidity stays trapped.
Protecting and recovering your smart devices
Phones and laptops get a lot of attention during water events, but in a real smart home you also have:
- In wall switches and dimmers
- Smart thermostats
- Ceiling speakers and in ceiling access points
- Cameras inside and out
- Battery sensors in hard to reach spots
Before any incident: basic protection steps
Some of this might sound obvious, but many houses do not do it.
- Keep routers, hubs, and NAS units at least a foot above floor level.
- Wall mount power strips or use raised racks where possible.
- Label cables and ports so fast disconnection is less chaotic.
- Use cloud backups for data you care about, not just local drives in the basement.
For devices near water sources:
- Place smart speakers and displays away from sinks and tubs.
- Use outdoor rated gear for exterior cameras and smart locks.
- Put a cheap leak sensor under any equipment shelf in the basement.
After an incident: deciding what to save
Not every wet device is a lost cause, but some are not worth the risk.
Reasonable guidelines:
- If a device was submerged in dirty or sewage water, replacement is usually safest.
- If clean water splashed the case but did not get inside, careful drying may be enough.
- If an in wall switch got soaked, it is often better to replace than to gamble on hidden corrosion.
You can:
- Dry external surfaces gently with towels.
- Let units air dry in a warm, ventilated room for several days.
- Have a repair shop open larger units if they are expensive enough to justify it.
And be honest with yourself: do you really want a half damaged smart switch behind a wall where it is hard to reach later?
Insurance, documentation, and using your “smart” proof
Water damage intersects with insurance in slightly messy ways. I am not a lawyer or adjuster, but I can say this: the person with better documentation usually has a smoother process.
How your tech helps:
- Leak sensor logs show clear start times.
- Camera clips show the progression of the event.
- Device offline logs back up your story about when power or internet went down.
When you talk to the adjuster, or fill out forms, you can share:
- A simple timeline with timestamps.
- Photos and video of affected rooms from different angles.
- A list of damaged smart devices with model numbers and approximate purchase dates.
That last part matters more than people think. Smart gear is not cheap, and it adds up fast.
Useful habit: keep a basic inventory of major devices in a note or spreadsheet, with values. It feels obsessive until something goes wrong. Then it feels practical.
Designing a smarter, more water aware home after a scare
Once you go through water damage once, you tend to see your house differently. You notice where pipes run, where drains are, and where cables cross those same areas. That awareness can guide upgrades.
Some long term ideas:
- Mount gear racks away from plumbing chases and sump pits.
- Plan network and power so that you can shut parts of the house off without killing your whole setup.
- Place dedicated smart displays or tablets that show leak status at a glance.
- Set up routines that test leak sensors and valves on a schedule so they do not quietly fail.
You can also adjust your building choices:
- Choose flooring that tolerates occasional moisture in lower levels.
- Use moisture resistant drywall in areas prone to leaks.
- Keep storage off concrete floors in basements with simple shelves or pallets.
It is not about making the house invincible. Water finds surprising paths. But you can reduce the damage window from “daylong disaster” to “short, annoying cleanup.”
Common myths about smart homes and water damage
Tech circles repeat a few ideas that do not quite match real life.
“I have sensors everywhere, so I am safe.”
Sensors help, no question. They do not help if:
- The battery is dead.
- The hub is offline.
- You ignore alerts or have notifications muted.
- The leak starts in a place with no sensor.
Think of them as smoke detectors for water. Useful, but only part of the story.
“Dry climate means low mold risk.”
Salt Lake is dry outside. Inside a wall cavity that was wet for three days, humidity can sit high for long enough for mold to grow. You just will not see it until later.
Restoration gear is not there to make pros look busy. It is there to get moisture in hidden spots back to a safe level.
“My server room is safe because it is in the basement.”
Basements are often the first place water collects. That does not mean you should haul everything up to the attic, but calling any below grade space “safe” from water is a stretch.
If your basement is your tech center, treat water risk as a design constraint, not an afterthought.
Quick FAQ for tech minded Salt Lake homeowners
How fast do I need to react to a leak?
Hours matter. If you can stop water and start cleanup within the first few hours, you reduce the odds of deep material damage and mold growth. That is where leak sensors and smart shutoffs really show their value.
Can I handle water damage on my own if I have fans and a wet vac?
You can handle very small spills or quick cleanups that never reach walls or subfloor. Once water touches drywall, insulation, or seeps under flooring, a professional crew is usually worth calling, even if you like DIY projects.
Are all my smart devices ruined after a flood?
Not always. Devices that stayed above water or had minimal splash might be fine after drying. Those submerged, especially in dirty water, often need replacement. Power electronics and in wall devices are higher risk.
Is a smart water shutoff valve actually worth the cost?
For many people, yes. One avoided major claim can pay for it, especially in a house with finished basement or expensive flooring. But it only helps if you maintain it and connect it to sensors or alerts you respond to.
What should I set up first if my smart home is still basic?
If water is your main concern, start simple:
- A few leak sensors in high risk spots
- Notifications that you will actually see and react to
- A plan for who shuts the water off and how
You can always layer in automations later once the basics are solid.