I used to think my biggest smart home worry was someone hacking my Wi‑Fi. Then I found out a mouse had chewed through an Ethernet cable behind my server rack and nested in the insulation over my home office.
If you want the short answer: the smartest way to defend your tech-heavy home from rodents is to treat it like a security system problem. You combine sensors, logging, and alerts with proper physical barriers and professional help from a company like Rodent Retreat, then you let automation handle the boring parts while humans handle the actual removal and sealing work. They are by far the best exterminators Fort Worth.
Why rodents are a real problem for tech people
If you have a normal house with a TV and maybe a router, rodents are annoying.
If you have a rack, a NAS, a home lab, 15 IoT devices, and a 3D printer idle in the corner, they are a real risk.
They chew wiring. They chew low-voltage cable. They chew insulation around pipes and electrical runs. They leave droppings on gear shelves. They raise humidity in closed spaces and sometimes cause small shorts that are hard to diagnose.
And they do something else that bothers people like you and me.
They introduce randomness into systems we expect to behave in a stable way.
You do not want to spend hours debugging “random” network drops that turn out to be a cable with tiny bite marks.
Rodents are not just a hygiene problem, they are a hardware reliability problem, especially in tech-heavy homes.
So the question is not “how do I get rid of mice” in a generic way. It is more “how do I design a simple, maintainable, almost boring rodent defense setup that fits into the way I already manage tech at home.”
The three layers of a smart rodent defense
You can think about it like a simple, slightly imperfect model with three layers. Not a framework, just something to keep the ideas sorted:
- Physical layer: block access, clean food sources, seal holes, safe wiring
- Detection layer: sensors, cameras, and data that tell you something is wrong early
- Response layer: traps, professional service, and some automation that helps you act fast
If any one of these is missing, the system still works, but you get more work, more guesswork, and more damage.
Physical defenses that respect your cables and gear
Smart solutions are nice, but if you give rodents unlimited physical access, your automations just send you pretty notifications while your cables get shredded.
Audit your “attack surface” like you would a network
When you harden a network, you map external entry points, exposed services, and weak credentials.
With a home, the same mindset helps: you map holes, gaps, food sources, and cozy dark places near warmth.
Places tech people often forget:
- Cable runs that go through the wall from an ONT to your router
- Holes drilled for Ethernet going to the attic or garage
- Gaps around mini-split lines, dryer vents, and utility entrances
- Server closets that pull warm air and dust, which also pulls rodents
- Under raised floors, behind built-in entertainment centers, behind racks
Spend one weekend crawling around with a flashlight. It feels tedious, but it is like finally mapping your home network: you suddenly see where the weak points really are.
Protect cables like you care about them
Rodents often go for cables, not from malice, but because they like soft plastic and hidden tunnels.
You can lower the risk a lot with simple changes:
- Run low-voltage cables through conduit where they pass through walls, attics, or crawl spaces.
- Use metal conduit or flexible metallic tubing in areas with clear rodent activity.
- Bundle cables and keep them off the floor in closets and offices.
- Pull unused cables instead of keeping them as “spares” on the floor, which just create more chew targets.
In a home lab, I made one small change that helped: I mounted a simple wire tray at the back of the rack, about 15 cm off the floor. All patch cables route into that. Before, cables lay on the ground behind the rack and that is exactly where I later saw droppings.
Any cable that runs along a floor in a dark, quiet area is basically an invitation for a rodent to treat it as a chew toy.
Seal entry points the non-perfectionist way
You can spend weeks perfecting every hole, or you can accept that 80 percent coverage is far better than none.
Areas to seal:
- Gaps around pipes with steel wool and caulk
- Large holes with backer rod and then caulk or foam, plus metal mesh where it makes sense
- Door sweeps for exterior doors that show light at the bottom
- Garage door side gaps, especially near storage with wiring or gear
You do not need to solve everything on day one. Work in passes:
1. Pass 1: seal the obvious large gaps.
2. Pass 2: focus on areas near wiring routes and utility entrances.
3. Pass 3: check attic and crawl spaces after you have some sensor data, which I will get to later.
At some point, it makes sense to bring in pros who do this all the time. That is the boring truth that many DIY people do not like. A company that does nothing but this work, like Rodent Retreat, can find entry points that are hard to see if you are new to it.
Detection: using your smart home as an early warning system
Now the more interesting part for tech people: treating rodent detection as another sensor problem.
You do not need a huge budget. You probably already have some of the gear.
Motion sensors that are not just for lights
Standard PIR motion sensors are cheap and flexible. Many smart home users only think of them for lights or security, but they can also hint at rodent patterns.
Where to place them:
- Near kitchen baseboards and pantry areas
- In the garage, near shelving and the corners that are always dark
- In the laundry room or utility room
- At the entrance to attic access points or crawl spaces
You are not trying to detect one mouse in real time. That is not realistic. You want patterns.
If you use Home Assistant, HomeKit, Hubitat, or similar, log motion events to a database. After a few weeks, you might see motion in the garage at 2:30 a.m. on days when nobody is home. That is a hint to check more closely.
Low-cost cameras where you already care about security
A lot of tech people have cameras at doors and maybe in the garage. A few tweaks can help with rodent monitoring.
Ideas:
- Use one or two indoor cameras facing along the floor line, not across the room.
- Set smart detection zones only around baseboards and appliances.
- Turn on “animal” or “other motion” detection if your camera supports it.
- Set storage to short clips rather than continuous, so you do not drown in useless footage.
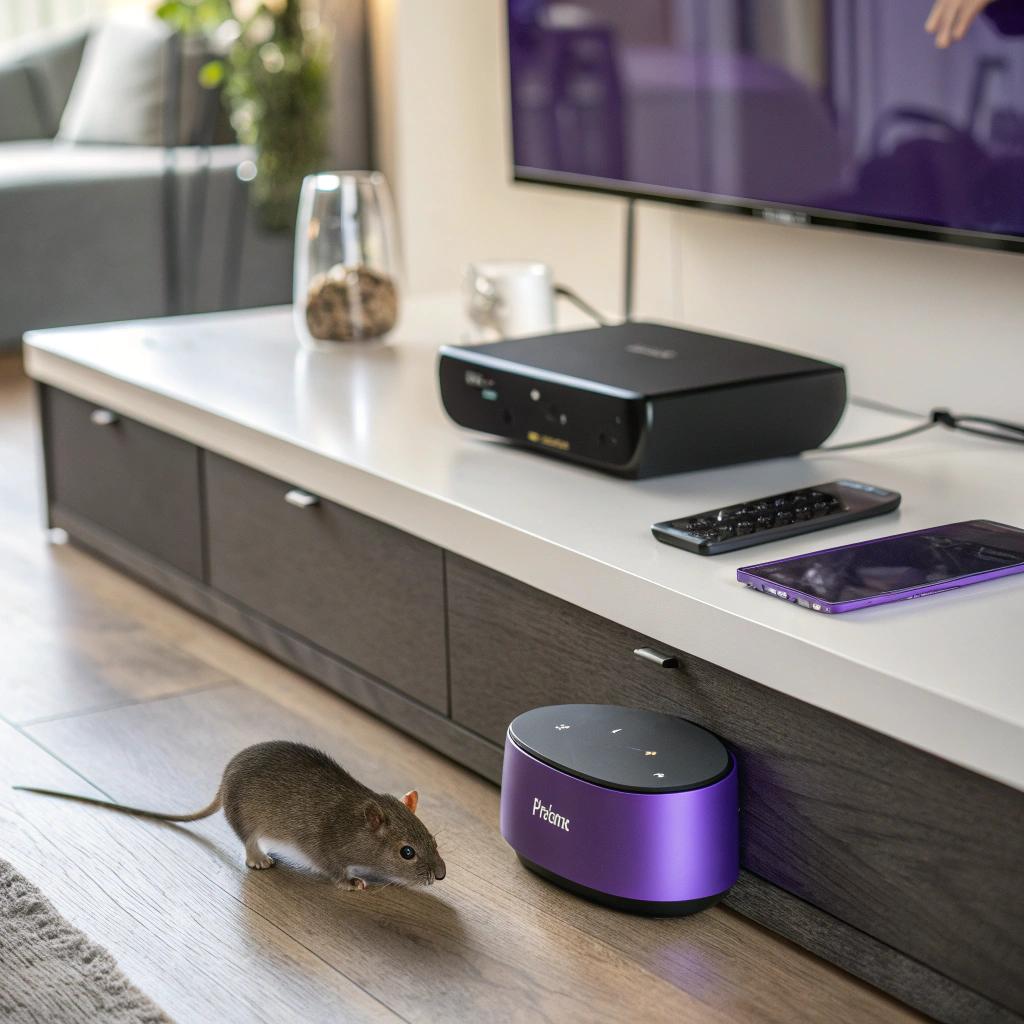
I once caught the first sign of a mouse because my garage camera pinged me with a notification showing “small motion at floor level” at 3 a.m. At first I thought it was a bug. Two days later, there were droppings behind a shelving unit.
You do not have to watch camera feeds live. Let them act as passive recorders, then review only when another signal suggests a problem.
Environmental sensors that quietly tell the truth
Rodent activity changes the environment in small ways:
- They bring in nesting material, which can raise localized humidity.
- They urinate and defecate in hidden corners, which changes smell and sometimes VOC levels.
- They create small air and dust flow as they move.
You can piggyback on this with sensors many smart home people already like:
| Sensor type | Where to place | What to watch for |
|---|---|---|
| Temperature / humidity | Attic, server closet, under-stair storage | Small but lasting humidity rises in closed spaces |
| Air quality / VOC | Near trash, pantry, garage, basement | Sustained VOC spikes that do not match cooking or cleaning times |
| Vibration / contact | On ductwork, metal shelves, attic access hatches | Short bursts of vibration at night |
None of these signals are perfect. They are noisy. But tech people are used to noisy signals. You combine them.
For example:
- Garage motion at 2 a.m. three times in a week
- Small humidity increase in the same area
- A bit of debris near a wall where there was none before
On their own, any one of those is nothing. Together, they suggest you take a flashlight and a camera and inspect that zone.
Log all this in one place
If you like Home Assistant, Node-RED, or similar tools, this part is almost fun.
Route all relevant sensor events into one dashboard:
- Motion from sensors near baseboards and storage areas
- Temperature and humidity from closed spaces
- Camera events marked as “other motion” or “animal”
- Contact sensor triggers from attic doors or crawlspace hatches
Set up a few automations that are not too aggressive. For example:
- If motion is detected in the garage between midnight and 5 a.m. on 3 different days in 7 days, send a notification saying “Check garage floor near east wall for signs of activity.”
- If humidity in attic increases by more than 5 percent and stays there for 2 days with no weather explanation, remind yourself to visually inspect that space.
- If a camera sees small motion along the floor twice in one night, capture those clips and store them in a specific folder named “rodent_checks”.
This keeps noise down. You do not need a push alert for every blip.
Response: combining automation with real-world action
The detection layer only helps if you act on signals quickly.
Here is where smart homes can help, but not replace, human work and professional help.
Smart alerts that actually get your attention
If you are like most tech people, you are already desensitized to generic alerts. So you need alerts that are rare and specific.
Some ideas:
- Use a different notification sound or channel for “rodent suspicion” events.
- Send alerts to multiple devices at once: watch, phone, and smart display.
- Include a clear call to action in the alert text, like “Check under kitchen sink today for droppings or chew marks.”
This sounds minor, but how many alerts have you ignored in the past week? Clear and rare notifications have a better chance of being taken seriously.
Smart traps: where tech helps and where it does not
There are smart traps that send notifications when triggered, count catches, and even hint at battery status.
They are not magic, but in certain setups they save time, for example:
- In attics that are hard to access
- High shelves in garages or storage rooms
- Second homes or rental properties
You set the trap, connect it to your Wi‑Fi or hub, then get an alert if it triggers. No more guessing if your trap is still empty after two weeks.
That said, tech does not fix basic placement mistakes. Old advice still matters:
- Place traps along walls, not in the middle of open space.
- Use several traps, not just one, near suspected paths.
- Wear gloves so you do not add strong human scent if that bothers you.
- Change bait regularly so you are not just decorating your attic with stale peanut butter.
When to bring in professionals
This is the part many tech people resist. I did too.
There is a mindset of “if I can build a Kubernetes cluster, I should be able to handle a rodent problem.” That belief is not always helpful.
Rodent control companies:
- Know where rodents usually enter for your house type.
- Have better equipment for sealing awkward spots.
- Understand local behavior patterns that you do not see from a few blogs.
- Handle clean-up and sanitation in a way that meets health rules.
The smart home part does not replace that. It complements it.
Think of it this way: professional service is the harden-and-clean phase. Your smart setup is the monitor-and-maintain phase.
If your sensors, cameras, and traps keep alerting you in the same area, that is a signal that you need someone with more experience. At that point, calling a company like Rodent Retreat is not giving up, it is just using the right tool for the job.
Designing a “rodent aware” smart home from day zero
If you are building out a new smart home setup or renovating, you have a chance to bake this thinking in from the beginning.
Think about wiring routes with biology in mind
We usually plan wiring routes around signal quality, aesthetics, and ease of installation. There is one more factor: how attractive that route is to rodents.
Better choices:
- Use vertical runs inside walls rather than crawling along unfinished floor gaps.
- Group utility penetrations together and protect that cluster with metal or cement board.
- Place junction boxes where they are easy to inspect with a flashlight.
- Avoid hidden voids behind built-ins where cable slack piles up in dark corners.
Sometimes the slight extra effort up front avoids ugly surprises later.
Include “pest zones” in your home automation map
When you document your smart home, you probably note rooms, circuits, controller IPs, and maybe VLANs.
Add one more simple layer: pest zones.
These are areas that matter for rodent defense, like:
- Kitchen lower cabinets
- Pantry and food storage spaces
- Garage corners and shelves
- Attic entry / crawl space zones
- Server closet or rack areas
Then map sensors and automations to those zones.
For example, in Home Assistant, you can group:
- All motion sensors and cameras that can see the floor in the garage as “Garage Rodent Watch”.
- Humidity and temperature sensors in the attic as “Attic Monitor”.
- Contact and vibration sensors on ductwork and attic access as “Structural Movement”.
Now a single glance at your dashboard tells you the state of your “pest view” of the house, not just the comfort or security view.
Use simple automations instead of trying to build a perfect AI system
There is a temptation to overdo this. You start thinking about training models on camera feeds or building fancy anomaly detection.
You probably do not need that.
Some lightweight ideas:
- Daily digest: At 7 a.m., send a short message listing any rodent-related triggers from the last day.
- Seasonal mode: In colder months, slightly increase sensitivity and trigger more frequent checks in attic and crawl spaces.
- Maintenance reminders: Every two months, remind yourself to inspect traps and re-bait or relocate them.
These automations are simple, maintainable, and they do not break if one integration fails.
Balancing DIY control with professional help
There is a tension here. On one side, you want to handle things yourself. On the other, rodent control is one area where bad DIY can drag on for months and cause damage.
So where is the line?
When DIY is usually fine
In my experience and from talking with others, DIY is often enough when:
- You saw a single rodent once, with no clear sign of an ongoing nest.
- You have clear entry points you can seal with basic materials.
- You catch activity early, thanks to sensors and cameras.
- You do not see repeat droppings or fresh gnaw marks after two to three weeks of action.
Then your smart home setup really shines. You detect, respond, confirm, and move on.
Red flags that suggest you need help
There are cases where DIY becomes stubbornness.
Watch for:
- Repeated sensor alerts in the same area over weeks.
- Noisy attic or walls at night, again and again.
- Cables with fresh chew marks in different rooms.
- Strong smell in closed areas that does not go away after you clean.
- Kids or pets showing interest in one wall or corner all of a sudden.
If your smart traps keep catching rodents in the same zone, that means you dealt with symptoms, not the source.
At that point, calling a professional is not overkill. It prevents more serious damage, both to the building and to your tech.
Case study: a smart home, a rack, and a quiet scratching noise
Just to make this less abstract, here is a basic example. It is a mix of personal experience and a few stories from friends, but close enough to what happens in real homes.
Stage 1: small clues that were easy to dismiss
A tech friend had a home rack in a closet. Nice setup, clean patch panels, decent cable management. One day, he noticed:
- A faint scratching sound at night, but only once or twice.
- His motion sensor in the hallway had “random” triggers around 3 a.m.
- Network logs showed a few reboots of a PoE switch over a month, which he blamed on heat.
He shrugged it off. We all do this. There is always some innocent explanation.
Stage 2: the sensors tell a clearer story
A few weeks later, he added a cheap Zigbee motion sensor inside the rack closet, mostly to turn on a light when he opened the door.
Then the logs showed motion in the closed closet at night, three nights in a row.
At about the same time:
- Humidity readings in that closet went up by a few percent, and stayed there.
- A smart camera in the nearby hallway showed small, fast motion near the baseboard in one clip.
Individually, those signals were weak. Together, they were enough to trigger a manual check.
He opened the closet, pulled the rack away from the wall, and found:
- Small droppings along the baseboard.
- Chew marks on one Ethernet cable.
- A gap in the drywall around where cables entered from the ceiling space.
Stage 3: a mix of DIY and expert work
He did a few things himself:
- Replaced the damaged cable and moved all cables into a short piece of flexible metal conduit.
- Placed two traps behind the rack and two in the attic above.
- Set up a simple automation: if closet motion happens when the door is closed, send an alert.
Within days, one attic trap triggered. The smart trap sent a notification so he did not have to keep checking it. After that, no more closet motion events for two weeks.
But he could still hear faint activity in the ceiling elsewhere.
He finally called a rodent control service. They did a full inspection, found several entry points on the exterior he never noticed, sealed them, and cleaned nesting material in the attic.
Now his smart home setup acts as an early warning system, not a substitute for the physical work that had to be done.
How to start if you feel behind
If you read this and think, “My house is a mess and I have no sensors in the right places,” that is not a failure. Most people start late on this.
Here is a simple path that does not require a huge project.
Step 1: map your tech and food zones
On a sheet of paper, draw a rough floor plan.
Mark:
- Any room with important tech: office, server closet, home theater.
- Food and trash zones: pantry, kitchen, pet food, trash cans.
- Obvious external access: garage, back door, utility rooms.
These zones are where rods and wires usually intersect, which is where you care most.
Step 2: repurpose existing sensors
Before you buy anything:
- Look at where your current motion sensors are.
- Check which cameras cover floor areas near walls or appliances.
- Review logs from humidity or air sensors in storage or attic areas.
You might realize you already have partial coverage. Maybe your garage camera just needs a different angle, or your existing motion sensor needs a new automation rule.
Step 3: add 2 or 3 small but strategic parts
If you want a short shopping list, not a huge haul, many people get a lot of value from:
- 1 or 2 extra motion sensors focused at floor level in garages or storage rooms
- 1 extra indoor camera pointing low along a baseboard run near tech or food
- 2 smart traps for hard-to-reach areas you hate checking manually
You do not need a huge grid of sensors. You need enough coverage that unusual patterns show up over time.
Step 4: write one or two clear automations
Resist the urge to script everything. Start with:
- A weekly or daily summary of rodent-related events.
- A rare, high-priority notification when multiple suspicious signals coincide.
If those prove useful, extend from there. If they just annoy you, tune or remove them.
Frequently asked questions
Q: Can I just rely on my cat or dog instead of sensors and traps?
A: Pets help, but they are not a full solution. Some rodents learn to avoid them. Cats might catch one mouse and ignore the rest. Also, pets do not seal entry points or protect your wiring. If you see your pet staring at a specific wall or cabinet a lot, that is a signal to investigate, not a fix.
Q: Are ultrasonic “rodent repeller” gadgets worth it for a smart home?
A: The evidence for those is mixed at best. Many people report rodents ignoring them after a while. They can also bother pets. If you want to experiment, treat them as a minor addition, not the main defense. Physical sealing, traps, and good monitoring are more reliable.
Q: How often should I inspect my tech areas for rodent damage?
A: At least every few months, and anytime your automation flags suspicious activity. For high-value areas like a server rack or media closet, a quick visual check once a month is reasonable. Look for droppings, frayed cables, and small debris. Your sensors help you focus, but a flashlight inspection will always see things no log file can show.