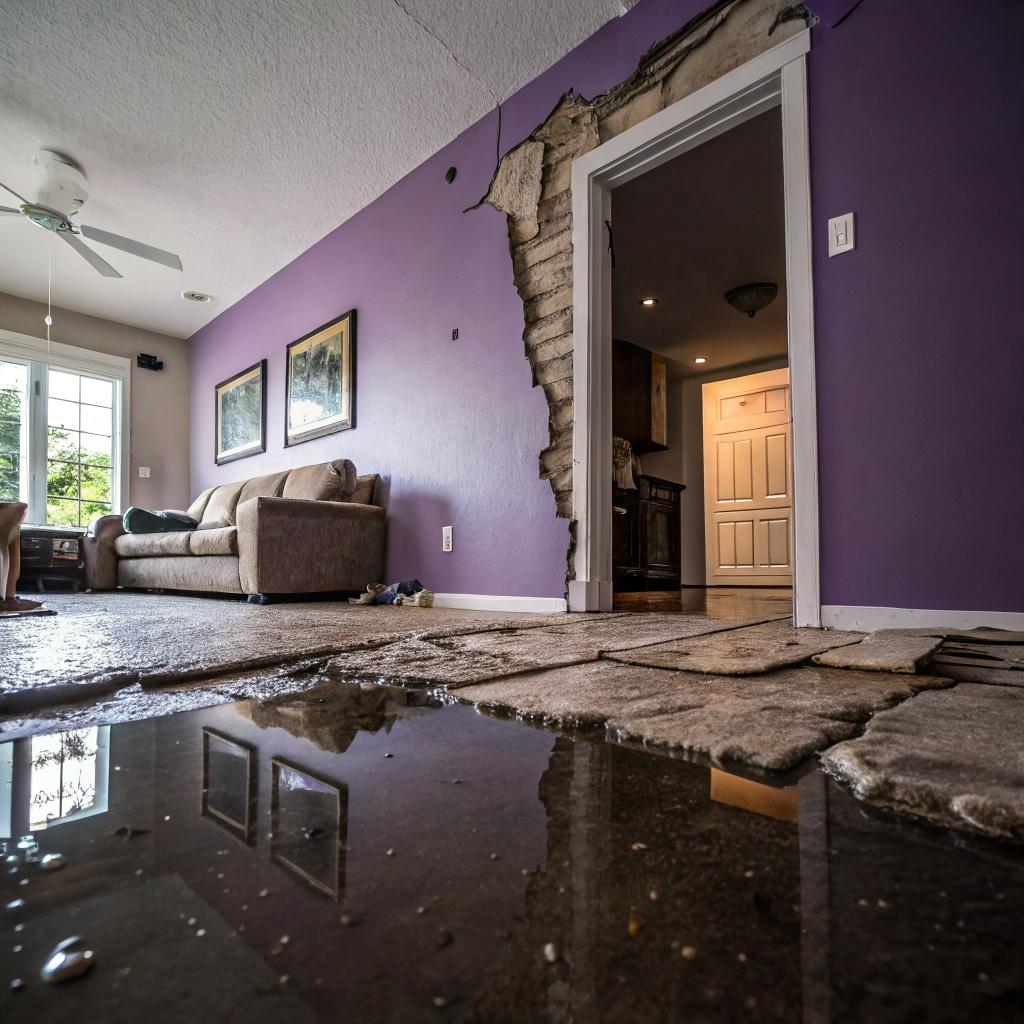
I used to think water damage was mostly about old pipes and bad luck. Then a smart leak sensor under my kitchen sink pinged my phone at 2:17 a.m., and I realized how much tech can change what happens next.
If you live in Salt Lake City and you find water where it should not be, the short answer is this: shut off the water, kill power in the affected area, protect or move your electronics, document everything with your phone, start basic cleanup, and then call a local specialist that handles Salt Lake City water damage restoration so they can bring in the serious drying and repair equipment. Your smart home gear is not enough on its own, but it can shorten response time and reduce the damage if you set it up the right way.
How water damage actually plays out in a tech-heavy home
Most guides talk in general terms. Roof leak, pipe burst, call someone, done. That sounds simple, but once you add smart thermostats, servers, gaming PCs, maybe a rack of networking gear in the basement, the story changes.
Water damage in a modern home usually hits you in one of three ways:
- A sudden event: a burst pipe, washing machine hose popping off, dishwasher overflow
- A slow leak: under a sink, behind the fridge, near a window, gradually soaking materials
- External water: snowmelt, heavy rain, or sprinkler problems leading to seepage or flooding
Each one interacts with your tech in different ways. A slow leak might corrode a power strip behind your TV setup. A washing machine overflow might spread across the floor and wick into a closet with network gear. Basement seepage might creep toward a home server.
The part that surprises many people is how much of the damage actually comes from time, not just the amount of water.
The first 24 to 48 hours matter more than almost anything else in water damage, especially if you care about your electronics and indoor air quality.
Mold can start to grow in that window. Particle boards can swell. Insulation can hold moisture like a sponge. Smart devices that survived the first splash can start corroding quietly.
So if you like tech, or at least rely on it, it makes sense to think about water like you think about backups and surge protection. Not just “hope it is fine,” but “assume something will go wrong and plan around it.”
Step-by-step: What to do in the first hour
That first hour after you see water on the floor or dripping from a ceiling can feel messy and rushed. Some people freeze, some panic, some start moving furniture without thinking about safety.
Here is a practical order that balances safety, your tech, and your long-term repair costs.
1. Stop the water at the source
If the leak is from inside your house:
- Shut off the local valve if you can reach it safely
- If you cannot find it fast, go straight to the main shutoff for the house
- For a smart home, consider a smart shutoff valve that can close the main line automatically
Common places for the main shutoff in Salt Lake City homes:
- Basement near the front foundation wall
- Crawl space or mechanical room
- Near the water heater
If the water is coming from outside (storm, snowmelt, irrigation), you might not be able to stop it, but you can often redirect it with quick barriers like towels, boards, or even bags of soil if you have them.
2. Kill power in the affected zone
Water plus electricity is still a bad mix, no matter how smart your home is.
If water is near outlets, power strips, or any wiring:
- Do not step into pooled water if the power is still on
- Go to your breaker panel and switch off the breakers for the affected rooms
- If you are not sure which breakers those are, switch off the main until you figure it out
It can feel like overkill, but that is better than getting shocked while trying to save a game console.
3. Protect your electronics fast
At this point, I think most of us focus on floors and carpets, and sometimes forget the electronics sitting quietly in harm’s way.
Look for:
- PCs, game consoles, routers, modems, NAS boxes on or near the floor
- Battery backups on the floor of a closet or office
- Smart speakers on low shelves
- Power strips under desks
If it is safe:
- Unplug devices before you move them
- Carry them to a dry room and set them on a table, not the floor
- Do not turn on any device that got wet, even a little
People often rush to test if the device still works. That can turn a recoverable board into a dead one. Let a pro look at it or at least let it dry completely before you test.
4. Document everything with your phone
Before you start pulling up carpets or cutting drywall, walk around with your phone and record video. Narrate what happened. Show the water line on walls, soaked boxes, damaged equipment.
Take close-up photos of:
- Water near outlets and switches
- Wet electronics and cables
- Ceiling stains and bulges
- Baseboards starting to swell
This helps for insurance, but it also helps the restoration crew understand what happened where, and what might be hiding behind walls or under floors.
If you only remember one thing for documentation, record a slow video walkthrough and store it in a cloud folder immediately.
5. Start basic water removal
For minor water on hard surfaces:
- Use towels, a mop, or a wet/dry vac to remove standing water
- Place fans to move air across surfaces, not straight at one spot
- Open windows if the outside air is dry and temperature makes sense
For any water that has soaked into carpets, walls, or insulation, you really hit a limit with home tools.
If more than a few square feet of carpet are saturated, or if your ceiling is bulging, call a local restoration company. That is not just a sales pitch. They bring commercial dehumidifiers, air movers, and moisture meters. Those make a real difference.
How Salt Lake City itself changes the water damage story
Salt Lake City has some quirks that affect both prevention and restoration. Ignoring those because “water is water” is a mistake.
Dry climate, big swings, and hidden problems
Salt Lake air is usually dry, especially in winter. That sounds like good news, because it should help things dry faster. The problem is that dry air can give you a false sense of security.
Surfaces might feel dry while deeper layers stay wet. For example:
- Top of carpet feels dry while the pad and subfloor are still soaked
- Drywall surface feels fine while the inner core is damp
- Wood framing behind a wall holds moisture long after you think it is over
That hidden moisture can feed mold growth in pockets. People are sometimes surprised by mold in a Salt Lake City home, because the climate feels too dry for it. Indoors, inside a wall, the climate is different.
Humidity spikes during storms or snowmelt add to the problem. Those short bursts of moisture can be enough to push vulnerable spots over the edge.
Basements, foundations, and snowmelt
A lot of Salt Lake City homes have basements or partial basements. That is good for extra space, but it also sets up some common water paths:
- Hydrostatic pressure pushing water through small cracks in foundation walls
- Improper grading outside that sends snowmelt toward the house
- Downspouts that discharge too close to the foundation
- Sump pits and pumps that fail right when you need them most
Tech-heavy homeowners sometimes put their servers, media rooms, or VR setups in basements. That puts some of your most fragile and expensive gear in the area most exposed to groundwater and seepage.
If that is you, it is worth pairing your smart home habits with some old fashioned building science. For example, make sure you know:
- Where the lowest point in the basement is
- Whether you have a sump pit, and if the pump works
- Where water from roof downspouts actually goes
- Whether you get small trickles on foundation walls during snowmelt
Local building quirks that affect restoration
Older Salt Lake neighborhoods might have galvanized pipes, mixed materials in the same house, or DIY remodels from past decades. That matters for water damage because:
- Old supply lines can corrode and burst with temperature changes
- Improperly vented bathrooms can support mold after even minor leaks
- Previous water events might have been covered with paint, not actual repairs
A good restoration crew in Salt Lake City tends to look for these patterns. They know where water tends to run in split level homes, which corners of older basements get damp first, and how snowmelt behaves on local soils.
Using smart home tech to catch water early
If you like tech, this is the part that actually feels a bit satisfying. Water damage is one of those problems where a small smart setup can change the timeline from “weeks of repairs” to “mop, dehumidifier, done.”
Leak sensors: cheap hardware, real value
Place wireless leak sensors in spots that see the most trouble:
- Under sinks in bathrooms and kitchen
- Behind or under the washing machine
- Under the dishwasher front edge
- Near the water heater base
- Behind the fridge if it has a water line
- On the basement floor near the sump pit
Pick sensors that integrate with your existing smart home platform, not just the cheapest ones. The whole point is alerts that reach you quickly.
Consider:
- Wi-Fi or Zigbee/Z-Wave, depending on your hub
- Battery life and battery change alerts
- Ability to trigger routines, like shutting off a smart valve
A $30 leak sensor that wakes you from sleep is often the difference between a small cleanup and a full restoration project.
Smart shutoff valves and actuators
Smart main shutoff valves are not for everyone. They are more expensive and usually need a plumber to install. That said, if you travel a lot or have a second home, it is a serious upgrade.
Two main approaches:
- A full replacement valve with motorized control
- A clamp-on motor that turns your existing valve
These can:
- Shut off water automatically when a linked sensor detects a leak
- Let you cut water from your phone if a neighbor messages you about a problem
- Add some peace of mind during long trips
Some also report water usage, which can reveal slow leaks.
Monitoring humidity and temperature
Mold risk depends on more than just water on the floor. Long-term humidity and temperature play a role.
You can use:
- Smart thermostats with remote sensors
- Dedicated Bluetooth or Wi-Fi hygrometers
- Multi-sensors in your home security system
Places where this matters:
- Basements, especially finished ones
- Closets on exterior walls
- Bathrooms with weak ventilation
- Rooms with a lot of gear that already run warm
You can set alerts when humidity stays high for a set number of hours. That might tell you about a slow leak or just a ventilation problem you have been ignoring.
Tying it together with automation
This is where you can overdo it a bit. It is tempting to automate everything and feel “done.” Automation helps, but it is not magic.
Reasonable automations:
- If a leak sensor triggers in the laundry room, send a push notification, flash smart lights, and turn off the washing machine smart plug.
- If a leak sensor triggers near the water heater and you are away, close the main water valve automatically.
- If basement humidity stays high for 4 hours, power on a dehumidifier smart plug and alert your phone.
Less helpful automations:
- Cutting power to an entire room every time any sensor blips once
- Running a dehumidifier nonstop because the target humidity number “looks nicer”
You want your tech to help you make better decisions, not just trigger for the sake of it.
What professional restoration actually does that you cannot
There is a point where towels and a shop vac do not cut it. It can be hard to know exactly when you cross that line, and people often wait too long.
A good Salt Lake City restoration team brings more than fans. Here is what they bring that you probably do not have.
Moisture detection beyond what you can see
Pros use:
- Pin and pinless moisture meters for drywall, wood, and concrete
- Infrared cameras to spot cold, wet spots behind surfaces
- Non-invasive probes for hard to reach areas
This matters because water loves to run sideways behind baseboards, under walls, and through tiny gaps. It can soak adjoining rooms that look fine.
If you are a data minded person, you might actually enjoy seeing the readings. They show how drying progresses and when your house reaches safe levels.
Controlled demolition and drying
Tearing things out yourself can make the job bigger than it needs to be. Pros aim for “remove only what you must” and dry the rest.
Typical actions:
- Remove baseboards to let wall cavities vent
- Drill small holes behind baseboards to move air through wet walls
- Pull up just the edge of carpet and sometimes remove the pad only
- Set up air movers to create targeted air flows across wet materials
- Place commercial dehumidifiers sized for your cubic footage and moisture load
They monitor moisture daily and adjust equipment. That feedback loop is hard to match with a single retail dehumidifier and a box fan from the garage.
Mold handling and air quality
If water sat for more than 24 to 48 hours, or if you see visible mold, that changes the job.
Restoration pros can:
- Contain work areas with plastic and negative air pressure
- Use HEPA air scrubbers to capture particles
- Remove contaminated materials under controlled conditions
They might also advise on when to bring in a separate mold inspector for testing. Opinions on testing vs direct removal vary, and you will hear some conflicting advice. That is normal.
Electronics and data
Most restoration firms are not full electronics labs, but many have relationships with specialists who focus on water damaged devices.
What they will likely tell you:
- Unplug everything and do not power on wet devices
- Do not use rice; proper drying and cleaning is more complex
- Prioritize devices with irreplaceable data (old hard drives, local only backups)
Some data recovery labs can clean and recover drives that look pretty bad. That said, you should still treat cloud and offline backups as your primary safety net. Water damage just reminds people why that matters.
Balancing cost, insurance, and what to DIY
Money always enters the conversation at some point. It might feel awkward, but it is real. Tech fans will spend a lot on gear and then try to save every dollar on repairs, which can backfire.
What usually makes sense to handle yourself
DIY tasks that are reasonable for most people:
- Stopping the leak, shutting off water, and making the area safe
- Documenting damage with photos and video
- Mopping or vacuuming small amounts of clean water on hard surfaces
- Moving undamaged contents, electronics, and furniture away from wet areas
- Running your own fans and dehumidifiers in mild cases
If water did not reach walls, insulation, or structural materials, and you start drying right away, you might keep it a small DIY project.
When it usually makes sense to call in help
You are likely better off with pros when:
- Water soaked into walls or ceilings
- Carpets and pads are saturated in more than a small area
- You see buckling, sagging, or bulging surfaces
- The water sat for more than a day before you found it
- The source was contaminated, like sewage or outside flood water
Waiting “to see how it dries out” often just gives mold extra time. By the time the smell shows up, the job gets bigger.
How insurance fits into all this
Home insurance often covers sudden and accidental water damage, like a burst pipe. It usually does not cover ongoing leaks that the insurer considers maintenance issues, nor outside flooding from natural sources unless you have a separate flood policy.
Common steps:
- Call your insurer early, but do not wait for permission to start drying
- Keep receipts for any emergency repairs or equipment rentals
- Share your photos, videos, and any moisture readings from the restoration company
Some restoration firms coordinate directly with insurers. That can be helpful, but it can also mean they speak in insurance language more than plain terms. Do not be shy about asking for clear explanations.
If something in the insurance conversation feels off, ask for it in writing and read it slowly later when you are less stressed.
Preventing the next water event, without turning your house into a fortress
It is easy to overcorrect after a bad leak. You buy sensors for everything, stare at moisture graphs every night, and think about pipes way too much. That energy fades, and then you are back to normal and maybe a little annoyed.
A more sustainable approach is to pick a handful of changes that reduce risk a lot, then forget about the rest.
Simple tech upgrades that actually pay off
Reasonable, one-time moves:
- Smart leak sensors in all high risk spots
- A smart shutoff valve if your risk profile and budget justify it
- Smart plugs for your dehumidifiers so you can schedule and monitor them
- Cloud backups for important local data, so hardware loss hurts less
Non-tech, but still pretty “smart”:
- Replace old rubber washing machine hoses with braided stainless steel
- Install drip pans under water heaters if the code allows and space permits
- Move power strips off the floor, especially in basements
- Raise servers and desktops onto shelves or stands
Seasonal checks for a Salt Lake City home
You can tie these into your tech routines. For example, every time you update firmware on your router, also check a few water related items.
Helpful seasonal habits:
- Before winter: disconnect and drain outdoor hoses, check for gaps around hose bibs
- At the end of winter: walk the perimeter during snowmelt, see where water runs and pools
- Before the rainy season: clean gutters, verify downspouts carry water several feet away
- Twice a year: test sump pumps by pouring water into the pit
You can put reminders in your calendar or smart home app. It does not need to be fancy.
Example setups: from “basic” to “maybe a bit much”
Sometimes it helps to see how different people might set things up. You can adjust from there.
Setup 1: Basic, sensible protection
- Leak sensors under each sink, at the water heater, and behind the washing machine
- One smart plug on a basement dehumidifier with a humidity based automation
- Power strips mounted on the sides of desks instead of the floor
- PC towers and UPS units on small stands above floor level
This keeps cost and complexity low but catches most indoor leaks early.
Setup 2: Tech-forward, frequent traveler
- All of setup 1
- Smart main shutoff valve linked to all leak sensors
- Basement multi sensor measuring temperature, humidity, and motion
- Cloud cameras watching utility areas so you can check in visually after alerts
- Automation that sends you and a trusted neighbor a message if any serious alert triggers
This is more gear, but it also means you can act from miles away when something goes wrong.
Setup 3: Overboard, but fun for some
- Leak sensors in every room with plumbing, plus near critical network nodes
- Water usage analytics tied into a dashboard
- Humidity and temperature sensors in multiple wall cavities
- Automatic logging of all moisture related data to a home server
At this level, you are collecting data for its own sake. If that motivates you, fine, but it is not required to keep a house reasonably safe.
Quick comparison: DIY vs pro restoration
Here is a simple table to frame the differences when you are deciding what to do next.
| Aspect | DIY approach | Professional restoration |
|---|---|---|
| Tools | Household fans, small dehumidifier, towels, shop vac | High capacity dehumidifiers, air movers, moisture meters, infrared cameras |
| Scope | Best for small, clean water leaks on hard surfaces | Handles structural materials, large areas, contaminated water |
| Speed | Slower drying, more guesswork | Faster drying based on measured moisture levels |
| Cost | Lower upfront, but risk of hidden damage later | Higher upfront, often partially covered by insurance |
| Risk of mold | Higher if moisture is missed behind surfaces | Lower, since they test and verify dryness |
| Impact on electronics | Focus on moving and air drying devices | Better assessment of what is safe to keep or clean |
Neither path is perfect. Some people overcall the pros for every drip. Others wait until walls smell musty. The better spot, I think, is somewhere in between.
Questions tech-minded homeowners often ask
Can I trust smart sensors as my main protection?
No. They are helpful, but they are not a full plan. Batteries die, Wi-Fi drops, apps crash. Treat sensors as early warning, not a guarantee. You still need physical checks, basic maintenance, and a plan for what you do when an alert shows up.
Is it safe to keep using my PC if it was in a damp room but did not get splashed?
Usually yes, if there was no direct water contact and only higher humidity for a short period. Wipe off any visible condensation, let the room dry fully, and watch for any strange behavior. If the device was visibly wet, that is different. Power it down, unplug it, dry it thoroughly, and consider professional cleaning before you power it again.
How do I know when things are truly dry?
If you are doing it yourself, you can use:
- Inexpensive moisture meters on drywall and wood
- Daily readings logged in a notebook or app
- Comparisons to known dry areas of the house
Pros look for moisture levels to return to normal for your building materials, not just “feels dry.” If you are not sure, you can always ask a restoration company for a moisture check only, without a full job attached.
If you had to pick just one change to make your Salt Lake City home more resilient to water problems this year, what would you focus on first: smart detection, better drainage, or finally getting those backups off the single external drive under your desk?