I used to think installing a smart EV charger was just a nicer looking outlet and a phone app. Then I tried to help a friend in Colorado Springs plan one and realized it is closer to a mini home infrastructure project than a gadget purchase.
If you just want the short answer: for a safe and practical smart EV charger setup in Colorado Springs, you need a dedicated 240 volt circuit, an electrician who knows local code and snow‑and‑cold realities, a charger that matches your car and panel capacity, and a permit with inspection from the city or county before you call it done. For most homes, that means a site visit, a quick load check of your electrical panel, a new breaker and cable run to the garage or driveway, and then a Wi‑Fi connected charger installed at the right height and weather rating. Many homeowners also end up doing a small panel upgrade when they realize their current box is already maxed.
Why smart chargers in Colorado Springs are not just a “nice to have”
Colorado Springs is an interesting mix: older houses with limited electrical panels, new builds with better wiring, cold winters, and more EVs arriving every year. A simple plug‑in Level 1 charger technically works, but it is slow. On a cold night, it can feel painfully slow.
A smart Level 2 charger changes your daily routine because it can:
- Charge several times faster than a standard outlet
- Adjust charging speed automatically so you do not overload your panel
- Schedule charging when electricity demand is lower
- Track how much power your car uses, which tech‑minded people usually enjoy seeing
The twist is that once you look into it, you run into boring, not‑very‑tech terms: amp ratings, breaker sizes, conductor types, local permits, snow melt patterns on your driveway. That is where most people hesitate.
If you only remember one thing: your smart charger is only as good as the wiring and breaker behind it.
So the rest of this guide walks through what a realistic install looks like in Colorado Springs, with a bit more detail than the usual quick blog post.
Level 1 vs Level 2 vs “DC fast” at home
Most people in Colorado Springs will pick a Level 2 smart charger for home use, but it helps to set expectations.
Level 1 chargers
This is the basic cord that often comes with the car, plugged into a standard 120 volt outlet.
- Power: around 1.4 kW
- Charge rate: about 3 to 5 miles of range per hour
- Good for: low daily mileage, apartments with no 240 volt option, or backup use
In winter, range loss means Level 1 feels even slower. Many people in Colorado Springs eventually move past it.
Level 2 chargers
This is what most people picture when they think “home charger” on the wall.
- Power: typically 7 to 11 kW at 240 volts
- Charge rate: around 25 to 45 miles of range per hour, depending on car and charger
- Good for: daily home charging, multiple drivers, preheating the car in winter
A “smart” Level 2 charger adds Wi‑Fi or Ethernet, an app, often load sharing, and sometimes integration with other smart home tech.
DC fast charging at home
Realistically, this is not a home option for almost everyone in Colorado Springs.
- Power: 25 kW to 350 kW at public stations
- Hardware cost: very high
- Electrical service: usually needs commercial‑grade service, far beyond a typical house panel
So for the rest of this guide, I will assume a smart Level 2 charger.
Local power, altitude, and winter: why they matter
Colorado Springs sits at higher elevation and has real winter. That affects two things that many people overlook.
Colder weather and charge speed
EVs charge a bit slower when the battery is very cold. You may notice:
- Lower charge rates on some winter mornings
- The car using extra energy to warm the battery
A Level 2 charger with enough capacity lets your car warm the battery and still add useful miles overnight. Level 1 often cannot keep up when you factor in preheating.
Panels in older homes
Many older houses in Colorado Springs have 100 amp panels, sometimes with almost every breaker slot filled. Adding a 40 or 50 amp EV circuit can push the system to its limit.
That is the point where an electrician will suggest a load calculation and possibly a panel upgrade instead of just “squeezing it in”. It can feel annoying, but it is safer than constant tripping or worse.
If your main breaker is 100 amps and every slot is full, expect a serious talk about panel capacity before anyone runs EV wiring.
Basic electrical concepts without the jargon
You do not have to be an engineer, but a few numbers help you make better choices and not get talked into the wrong gear.
Amps, volts, kW
For a typical home EV charger circuit in the United States:
- Voltage: 240 volts
- Breaker size: usually 40, 50, or 60 amps
Chargers run at 80 percent of the breaker rating for continuous loads, so:
| Breaker size | Max continuous charging amps | Approx power (kW) | Typical miles of range per hour |
|---|---|---|---|
| 40 A | 32 A | About 7.7 kW | 22 to 30 |
| 50 A | 40 A | About 9.6 kW | 28 to 36 |
| 60 A | 48 A | About 11.5 kW | 30 to 40 |
Your car also has a limit. For example, some EVs only accept 32 amps on AC, so a bigger charger will not make them faster. You want the charger and breaker to match what the car can use, or at least be in the right ballpark.
Wi‑Fi, apps, and real “smart” features
There is some real value here, beyond the marketing language.
Typical smart charger features:
- Remote start and stop from your phone
- Scheduling charge windows
- Energy usage tracking per session, day, or month
- Adjustable current limit, which matters if your panel is small
- Load sharing with a second charger in the future
Tech‑interested readers often care about open protocols or API access. Some brands support this, some are very closed. That might affect your choice if you want to tie the charger into Home Assistant or another local automation platform.
Finding the right spot to mount your charger
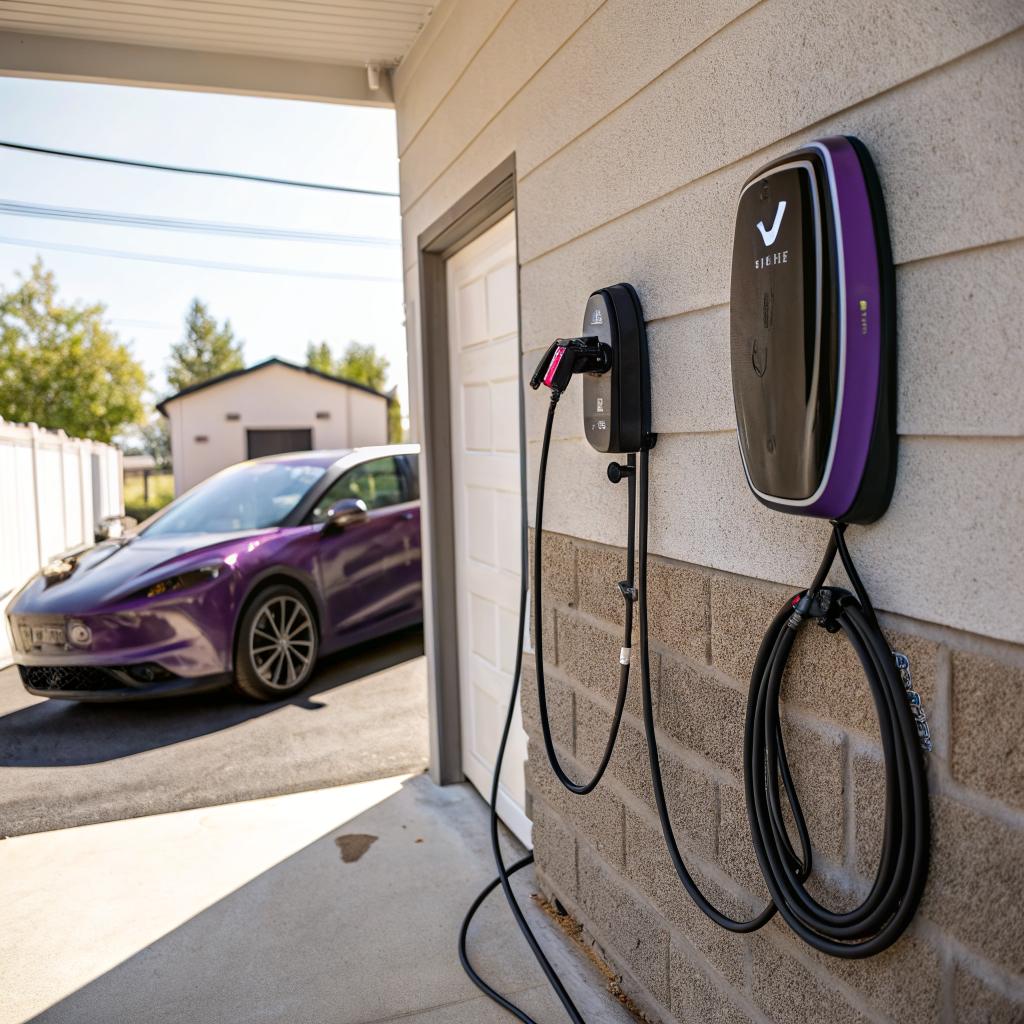
Many people start with “garage wall” and do not think further. That can work, but placement affects cost and daily use.
Think through your parking patterns
Ask yourself:
- Do you park the car in the garage, outside, or both depending on weather
- Where is the charge port on your car: front, rear left, rear right
- Do you expect a second EV in the next few years
A simple mistake is mounting the charger near the wrong corner of the garage. Then the cable needs to cross walkways or barely reaches.
A 25 foot cable sounds long until you deal with a tight two car garage and a car with a rear charge port.
If you can, mock it up with a long extension cord or even a rope to see where the cable would naturally hang.
Garage vs outdoor mounting in Colorado Springs
Garage mounting:
- Protects the unit from snow and ice
- Usually cheaper because runs are shorter and easier
- Works well if you park inside most days
Outdoor mounting:
- Helpful if the garage is detached or too far from the panel
- Needed if you do not park in the garage
- Requires a charger rated for outdoor use and proper weatherproof conduit and covers
In Colorado Springs, outdoor setups must handle snow piles and plows. You do not want the charger or pedestal where a dripping roof edge creates an ice mound right under it.
Permits, codes, and why Colorado Springs cares
This is the part many tech people want to skip. I understand the instinct to “DIY and figure it out.” For level 2 EV charging, that is not a good idea.
Do you really need a permit
In most cases, yes. Colorado Springs and El Paso County expect a permit and inspection for a new 240 volt circuit and for any panel upgrade.
Permits help:
- Verify that the wire size matches the breaker and load
- Catch unsafe grounding or bonding issues
- Protect you if there is an electrical fire and the insurance company checks records
Some people skip this and hope for the best. I do not recommend that path, especially with a continuous high power load like an EV.
Local code basics for EV circuits
Electricians in Colorado Springs follow the National Electrical Code plus local amendments. A few common details for EV circuits:
- Dedicated circuit only for EV charging
- Correct conductor size for the breaker rating and length of run
- GFCI protection in some cases, depending on location and setup
- Proper mounting height and support for the charger and conduit
If the house is older and has aluminum branch wiring or an outdated panel brand, the electrician may flag that as a separate issue that should be fixed.
How panel capacity affects your options
This is often the make‑or‑break step financially.
Checking your main panel
You can do a quick visual check before calling anyone:
- Look at the main breaker rating on the panel door, usually 100 A, 125 A, 150 A, or 200 A
- See how many slots are left
- Note big loads: electric range, electric dryer, AC, electric heat, hot tub
If the main is 200 amps and there are open slots, your odds are good. If it is 100 amps and fully packed, expect a more detailed conversation.
What a load calculation involves
An electrician or engineer adds up all the big loads in your home use, applies standard diversity factors, and checks if there is room for an EV charger.
They will ask questions like:
- Gas or electric range
- Gas or electric dryer
- Electric water heater
- Central AC or heat pump size
- Any large workshop tools
The result may be:
- “You are fine with a 40 amp charger”
- “You can add a 30 amp circuit, but not a 50 amp one”
- “You really need a panel or service upgrade to do this right”
Panel upgrade vs smart load management
If your panel is too small, you have two basic routes.
| Option | What it is | Pros | Cons |
|---|---|---|---|
| Panel/service upgrade | Replace panel and sometimes service entrance with a larger one, often 200 A | Plenty of future capacity, cleaner layout | Higher upfront cost, more work, permits |
| Smart load management | Use a device or charger that limits EV charging when the home load is high | Lower cost, faster to install | Charger may slow or pause during high usage, more complex setup |
For many tech‑minded homeowners, smart load management is interesting because it feels like part of a wider smart home approach. It is not perfect, but it can avoid a full service upgrade.
Step by step: what a real installation looks like
The exact path depends on your house, but the broad steps are fairly similar.
1. Site visit and quote
A good electrician will:
- Look at your main panel and any subpanels
- Check grounding, bond jumper, and general condition
- Walk the route from panel to the proposed charger location
- Measure distances and look for obstacles
- Ask how you plan to use the car and charger
You should ask:
- What breaker size and wire gauge they plan
- Whether the quote includes permits and inspection
- How they plan to route conduit in the garage or outside
- What happens if the inspector asks for a change
If you want someone who already handles EV charging work in the area, you can look at services like EV charger installation Colorado Springs CO and compare their process with others.
2. Choosing the charger model
You can either:
- Buy the charger yourself and have the electrician install it
- Let the electrician supply a model they know well
Things to look at beyond brand:
- Maximum current rating, and whether it can be dialed down in software
- Wi‑Fi reliability and app reviews, not just the star rating
- Cable length and flexibility in cold weather
- Hardwired vs plug‑in: hardwired is often better outdoors or for higher currents
- Support for multiple users if you share with roommates or family
Some people like to match brand with their car, others do not care. Function usually matters more.
3. Permits and scheduling
Your electrician should handle:
- Pulling the electrical permit
- Coordinating any required service shutoffs with the utility, if they are upgrading the panel
- Scheduling the inspection
This is one place where a local company that frequently works in Colorado Springs can move faster, simply because they know the local process.
4. Installation day
The work itself usually falls into a few tasks.
- Turn off power to the relevant panel
- Install a new breaker in the main panel or subpanel
- Run conduit and cable along the planned route
- Mount the charger, connect wiring, and test connections
You might be without power in parts of the house for a short time. The crew will usually turn the main back on as soon as it is safe.
If outdoor work is involved, winter installs might take longer. Concrete, frozen ground, and ice on ladders make everything slower.
5. Testing and app setup
After power is on:
- The electrician tests voltage and confirms correct wiring
- You plug in your car and verify that it starts charging
- You connect the charger to your Wi‑Fi and configure the app
Common things to tweak:
- Set a maximum current that matches the breaker and any panel limits
- Set charging schedules if your utility has different time periods
- Name the charger if the app supports more than one device
6. Inspection
A local inspector will check:
- Correct breaker size and labeling
- Proper conductor size for the run
- Secure conduit and fittings
- Grounding and bonding
If the inspector asks for changes, the installer should handle them. After that, the job is considered complete.
Cost ranges and what drives them
People always want a single number. It varies more than most expect.
Key cost factors:
- Distance from panel to charger
- Panel capacity and need for upgrade
- Indoor vs outdoor mounting
- Type of charger and whether it is hardwired
- Condition of existing electrical system
In simple terms:
- Short indoor runs with a 200 A panel are on the lower end
- Outdoor runs that require trenching or long conduit runs sit in the middle
- Panel or service upgrades move things to the higher end
If an electrician gives a price without asking about your panel, charger location, and house layout, that is usually a red flag.
Smart features you will actually use vs the ones you will forget
Many chargers advertise a long list of smart features. In practice, some become part of your routine, others you ignore.
Features most owners end up using
- Scheduled charging windows
- Adjustable amperage
- Session history and monthly energy reports
These are useful even if you do not obsess over every kWh. They give you a sense of how much of your monthly bill goes into the car and help adjust patterns.
Features that sound nice but are less used
- Third‑party voice assistant control
- Special sharing modes for Airbnb or public use at a private house
- Complex smart grid features that your utility does not yet support
For a tech‑oriented reader, open API or local control can be a serious reason to pick one charger over another, but this is a smaller group.
Dealing with Wi‑Fi in garages and outside
Smart features rely on stable connectivity. Garages and exterior walls can be Wi‑Fi dead spots.
Practical options:
- Add a Wi‑Fi extender near the garage
- Use a mesh Wi‑Fi system with a node in or near the garage
- Choose a charger with Ethernet if you are willing to run a cable
Some chargers can still function without internet for simple plug‑and‑charge, but you lose scheduling and data logging. If the Wi‑Fi barely works, you might end up frustrated instead of gaining convenience.
Before installation day, check your phone’s Wi‑Fi signal at the exact spot where the charger will go.
Safety tips that are boring but matter
EV charging pulls a lot of power for long periods. That deserves respect.
Do not use random adapters
This is an easy mistake. A cheap adapter that “makes it fit” can overheat or bypass required safety features.
Stick to:
- Proper NEMA receptacles if you use a plug‑in charger
- Hardwired chargers where the electrician controls all connections
- Approved, grounded adapters from the car manufacturer if needed
Inspect the cable and connector once in a while
Look for:
- Cracks or cuts in the cable jacket
- Discoloration or melted plastic on the connector
- Loose mounting screws on the holster or wall plate
If something looks off, stop using the charger and call the installer or manufacturer.
Planning for a second EV or future upgrades
Even if you have one EV today, think long term.
Load sharing setups
Some smart chargers support pairing, where:
- Two chargers share a single larger circuit
- The system divides available current between them
- You can configure priority or equal sharing
If a second EV is likely, ask your electrician to plan the conduit and panel layout so adding a second unit is easier. Running a slightly larger conduit now might save a lot of trouble later.
Future electrical projects
EV charging is one piece of the puzzle. Other projects that draw serious power:
- Electric heat pumps
- Induction ranges
- Home workshops and welders
- Hot tubs or swim spas
If you think you will add any of these, leaning toward a panel upgrade sooner can make sense, even if you could barely squeeze in the EV on the current setup.
Common mistakes and how to avoid them
I have seen a few patterns that keep repeating.
Buying the biggest charger “just because”
People sometimes buy an 80 amp charger thinking bigger is always better. Then:
- Their panel cannot safely feed it
- Their car only accepts 32 or 40 amps
- The install cost rises for no benefit
Check your car’s maximum AC charging rate first. Match or slightly exceed that, but there is no need to go far beyond it for most homes.
Ignoring cable management
A heavy cable on the floor becomes a trip hazard and collects slush and dirt. Look for:
- A charger with a built‑in holster and hook
- An extra hook or reel mounted by the electrician
- Placement that keeps the cable off the ground when not in use
Small detail, but you notice it every single day.
Not thinking about snow and ice
For outdoor setups in Colorado Springs:
- Keep the charger away from roof edge drip lines
- Avoid locations where snow piles block access
- Mount at a height that stays above typical snow build up, but still easy to reach
Quick FAQ for Colorado Springs smart EV charger installs
Do I need a smart charger, or is a basic Level 2 enough
You do not strictly need one, but smart features help in three ways: controlling current, scheduling, and tracking usage. If you like data and remote control, you will probably use the app a lot. If you are indifferent, a simple charger still works fine as long as it is sized correctly.
How long does a typical installation take
Most straightforward installs finish in half a day. Panel upgrades or complex runs can push it to a full day or more. The actual charging part is usually tested the same day. The inspection might happen a bit later, depending on scheduling.
Can I DIY my own EV charger circuit if I am “good with electronics”
Being good with electronics is not the same as following electrical code for high current household wiring. A mistake here affects fire risk and insurance coverage. You can research and pick hardware yourself, but for the actual wiring and panel work, hiring a licensed electrician in Colorado Springs is the practical route.
What if my EV is on a lease and I might switch brands later
Most Level 2 chargers use the common J1772 connector, and Tesla includes adapters or has its own plug, depending on model and region. If you lease and think you will swap brands, picking a widely compatible charger helps avoid being locked into a single car ecosystem.
How should I prepare before calling an installer
You can make the first call smoother by:
- Taking clear photos of your main electrical panel with the door open
- Measuring distance from the panel to your preferred charger spot
- Knowing whether your major appliances are gas or electric
- Deciding if you want indoor or outdoor mounting
With that information ready, you can have a more concrete conversation and get a quote that actually reflects your house, not just a generic guess.