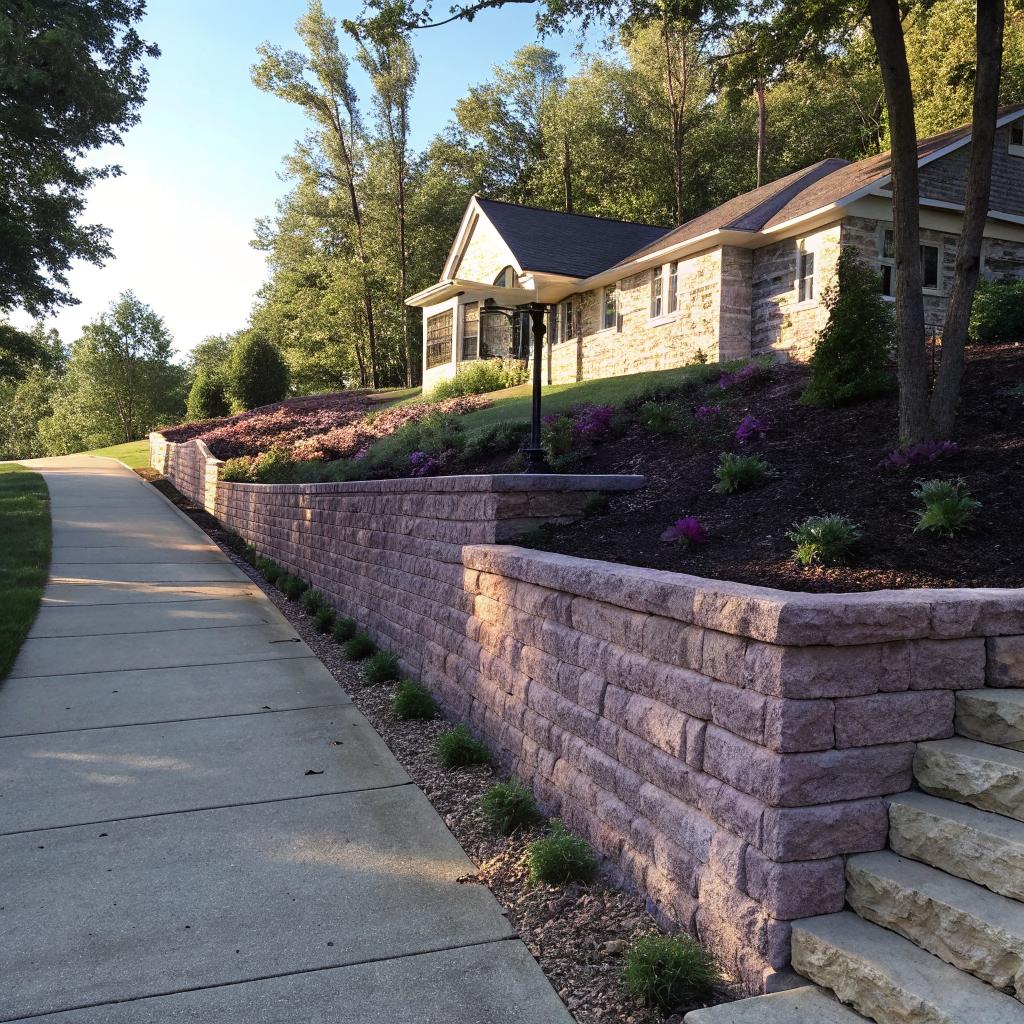
I used to think retaining walls were just boring stacks of blocks holding back dirt. Then I watched one fail after a heavy storm, and I stopped seeing them as simple yard features and started seeing them as small engineering projects that need real thought.
If you want a smart design for a retaining wall in Knoxville that holds up over time, the short answer is this: match the wall type to the soil and slope, size the drainage and footing using basic engineering logic, and treat the build like a long-term system instead of a weekend decor project. For most homeowners, that means talking with a local contractor who knows the codes, the clay-heavy soil, and the way Knoxville rain hits a hillside, such as a specialist in retaining wall Knoxville TN projects, then using that input to guide your design choices instead of guessing from a few YouTube videos.
Why retaining walls in Knoxville need more brain than muscle
Knoxville has a tricky mix for any outdoor structure: clay soil, random heavy storms, and lots of sloped yards. That combination is tough on a wall that has to hold back tons of wet soil.
If you think of a retaining wall as a smart mechanical system, not just stacked material, it starts to make more sense. You have:
The soil as a moving load, the water as a hidden pressure, and the wall as the interface that has to manage both without tipping, sliding, or cracking.
Once you see it that way, you start asking better questions:
- What is the soil type behind the wall and under the footing?
- Where will water go during a thunderstorm?
- How will freeze–thaw cycles and small ground shifts affect the structure after 5 or 10 years?
- How will the wall look next to your house, deck, or patio, not just right now but when it weathers?
This is where people who like tech often enjoy the process. You can measure, compare, and design. You can treat it like a small engineering or product design problem.
Reading your yard like a system, not a blank canvas
Before deciding on materials or layout, try to map your yard as if it were a simple physical model. That might sound a little nerdy, but it actually saves time and money.
Step 1: Understand the forces, not just the view
If you strip away the plants and decorations in your mind, you are left with:
- Soil type and depth
- Natural slope and direction of water flow
- Existing structures and loads
- Sun exposure and vegetation
Each of those affects your retaining wall design.
Clay soil holds water and expands. Sandier soil drains faster but can shift more. Knoxville often leans toward the clay end of the spectrum, which means more water pressure behind any wall.
Ask yourself:
– Does water already pool near the spot you are thinking about?
– After a heavy rain, where does the runoff go?
– Are there trees uphill whose roots may push the wall in a few years?
– Will there be a driveway, patio, or parking area near the top of the wall?
You do not need fancy tools. You can observe after a storm, take a few basic measurements, and make a rough sketch.
Step 2: Decide the real job of the wall
This is where many designs go wrong. People try to make one wall do three jobs at once: prevent erosion, create a level area, and look like a showpiece backdrop. It can sometimes do all three, but usually one priority should lead.
Common primary roles:
- Holding back a steep slope to protect a foundation
- Creating a flat yard or garden area
- Terracing a hill for safer walking paths or steps
- Supporting a driveway, parking area, or patio
If the wall is protecting your house or supporting a vehicle load, take the structural side very seriously. For a low garden terrace, you can relax a bit, but drainage and base prep still matter if you want it to last.
Comparing common retaining wall types with a clear head
People search Pinterest, see a nice photo, and think, “That one.” That is usually backward. Form should follow the forces and the function.
Here is a simple table you can scan, with tradeoffs that matter in Knoxville:
| Wall Type | Typical Height Range | Good For | Watch Out For |
|---|---|---|---|
| Segmental concrete block (with lip or tongue) | 2 to 6 ft (taller with engineering) | Residential yards, curves, tiered designs | Needs proper base and drainage, DIY mistakes common |
| Poured concrete | 3 to 10+ ft (engineered) | High loads, close to structures, modern look | Requires good forming, reinforcing, and crack control |
| Timber (treated) | Up to 4 ft (practical) | Budget projects, rustic look, lower loads | Finite lifespan, rot risk, more movement over time |
| Natural stone (dry stack) | 2 to 4 ft (without engineering) | Gardens, older homes, visual appeal | Labor intensive, needs skill for stability |
| Gabion baskets | 3 to 8 ft | Erosion control, near water, rugged looks | Can look industrial, needs proper fill and tying |
A lot of Knoxville residential walls fall into the segmental block or timber category. Those are fine, but the choice should be based on how tall the wall is, what it is holding, and your tolerance for maintenance.
If you care more about “set it once and do not think about it for twenty years,” then poured concrete or good block systems with proper design usually win in the long run, even with higher upfront cost.
Soil, water, and gravity: the quiet trio that decides success
Here is where the tech mindset helps again. Think like a simple physics diagram.
The wall fights:
– Lateral earth pressure from the soil
– Added pressure from water trapped behind the wall
– Gravity pulling the wall forward or causing the base to sink
You cannot remove those forces. You can only redirect or reduce them.
Soil type and compaction
In Knoxville, a lot of backyards have a mix of red clay and fill material from when the house was built. That fill can be loose and irregular. Building a wall on top of that without compacting the base is like placing a bookshelf on a mattress.
Good practice, even for small walls:
- Excavate down to firm, undisturbed soil for the base.
- Add a layer of compacted crushed stone under the wall blocks or footing.
- Compact the backfill behind the wall in thin layers, especially near the front.
You do not need lab-grade compaction, but skipping it often leads to leaning or bulging within a few seasons.
Water management: the part people regret skipping
Water builds pressure behind the wall, especially in clay soil that drains slowly. If it has no easy path out, the wall is suddenly dealing with a much larger load than you planned.
Smart drainage design usually means:
- A gravel zone behind the wall (often 12 to 24 inches thick for taller walls)
- A perforated drain pipe at the base of that gravel layer
- Filter fabric to keep soil from clogging the gravel
- Surface grading that directs rain away from the top of the wall
If you only remember one technical idea about retaining walls, remember this: your design is either letting water through and away on purpose, or it is trapping it by accident.
In Knoxville storms, that difference often decides whether your wall lasts 2 years or 20.
Finding the smart height and layout, not just the legal one
Most codes in U.S. cities, including many parts of Knoxville, draw a line at about 4 feet. Taller walls often need an engineer to sign off. Some homeowners see that as annoying. I think of it more like a guardrail that keeps you from making a choice that will cause trouble later.
Single tall wall vs. tiered walls
If you need to hold back a significant slope, you usually have two broad options:
- One tall wall
- Two or more shorter, stepped walls (terraces)
Each has tradeoffs.
Single tall wall pros:
– Takes less yard space front-to-back
– Can look clean and modern
– Easier to mow and maintain above and below
Single tall wall cons:
– Needs stronger design and sometimes engineering
– Higher failure risk if drainage or footing is weak
– More visible if it moves or cracks
Tiered wall pros:
– Each wall deals with less pressure
– More planting space and visual interest
– Often easier to handle with smaller equipment
Tiered wall cons:
– Needs more space on the slope
– Water must be managed carefully at each level
– Can look cluttered if not planned as a whole
From a “smart design” angle, tiered systems usually feel safer. From a budget and space angle, a single wall sometimes wins. There is no perfect answer, but ignoring the structural side tends to backfire.
Picking materials with both logic and aesthetics in mind
This is where people tend to lean more on personal taste, which is fine, but there is room for quiet logic here too. You can treat it like comparing phones: not just the color, but the performance, longevity, and ecosystem around it.
Segmental concrete block systems
These are the modular blocks you see all over newer neighborhoods. They lock together, often with lips or pins, and they rely on weight, geometry, and sometimes geogrid (synthetic reinforcing buried into the soil) for strength.
Why they are a smart default in many Knoxville yards:
- Designed as a system, so you get predictable behavior.
- Curves and corners are possible without complex cuts.
- Repairs or changes are easier than with poured concrete.
Points to think about:
– You still need a proper base and drain.
– Taller walls may need geogrid layers extending back into the slope.
– Color and texture options can help match your house or patio.
Poured concrete
This is the “solid slab” approach. It tends to suit people who like clean lines, maybe with modern homes or garages near the wall.
Pros:
- Very strong when designed and built correctly.
- Good for tight spaces and high loads.
- Can be faced with stone or stucco later for a different look.
Issues to manage:
– Cracking, if joints and reinforcement are not planned well.
– Drainage, since water does not pass through the wall itself.
– Cost, as forming and finishing take skilled labor.
Timber and natural stone
Timber walls feel warm and fit wooded lots. Stone feels more permanent and can match older homes.
Timber:
– Lower upfront cost in many cases.
– Easier to work with basic tools.
– Needs good drainage and contact protection to slow down rot.
– Realistic lifespan is shorter than masonry or concrete.
Natural stone:
– Very strong if stacked well and sized correctly.
– Visually appealing in gardens and near older houses.
– Needs careful layout, especially at corners and turns.
– Skilled installers matter a lot, since each stone is unique.
You do not have to chase “forever” materials if the budget does not allow it, but it helps to be honest about lifespan. If you are fine with a 10 to 15 year wall while you figure out long term plans for the property, timber might make sense. If you want to “set and forget”, concrete or well designed block wins.
Smart drainage details that save you from surprise repairs
I am repeating drainage in different ways on purpose because so many failures trace back to it.
Here is a small, practical layout that works for many walls in the 3 to 6 foot range:
- Excavate enough depth to place the wall base on compacted crushed stone, not just soil.
- Lay a 4 inch perforated pipe at the back of the base, sloped slightly toward one or both ends.
- Surround the pipe with clean gravel, at least several inches all around.
- Continue that gravel zone up behind the wall for 1 to 2 feet, depending on wall height.
- Wrap soil side with geotextile fabric so fine particles do not clog the gravel.
- Backfill the rest with compacted soil in layers, not just dumped in.
For a tech minded person, you can think of the gravel and pipe as a low resistance path for water, like a wider data bus. Water will follow the easier path if you give it one.
Trapped water expands your load, erodes your base, and finds hairline cracks. Hand it a clear exit route instead of hoping it will behave.
Also do not forget surface runoff. If the top of your wall is flat and the yard slopes toward it, a lot of water will head straight for the backside. Simple grading, shallow swales, or even a short surface drain can change that pattern.
Using basic “engineering thinking” without a degree
You do not need advanced math to think like an engineer here. You mostly need a few habits.
Ask “what if” for extremes, not averages
Knoxville has dry spells and then soaking rains. Design for the heavy storm, not just a regular shower.
Ask yourself:
- If the drain pipe clogs, where will the water go?
- If the soil behind the wall becomes fully saturated, will the wall still be stable?
- If a car parks near the top edge, does that change what the wall experiences?
Even thinking through those questions at a basic level pushes you toward better choices, such as oversizing drainage, adding geogrid, or pulling paved areas a bit farther from the top edge.
Check load chains, not isolated parts
A lot of people look at a retaining wall face and forget about the chain from top soil to bottom support. A simple mental model:
– Load starts in the soil and any structures above.
– It transfers to the wall blocks or concrete.
– It moves from the wall to the base material.
– It goes from the base into the native soil below.
Weakness in any link causes movement.
For instance, a thick block wall can still lean if it sits on poorly compacted fill that settles. Strong concrete can crack if the base shifts under one section more than another.
If you think about the chain instead of just the visible part, you naturally pay more attention to base prep and backfill. It is not the glamorous part, but it is what keeps the visible part from becoming a problem.
Smart use of tech for planning and monitoring
Since this article lives on a tech focused site, it feels fair to say that tech can actually help here without overhyping it.
Using simple tools and apps during planning
You do not need CAD, but a few modern tools can make planning easier:
- Phone level or angle apps to measure slope more accurately.
- Augmented reality or simple 3D apps to visualize wall height and shape.
- Spreadsheet or basic calculators to compare material quantities and cost.
You can also pull rainfall data and soil maps for your area. That might sound like overkill, but if you are already the sort of person who checks specs before buying hardware, it feels natural.
Sensors and basic monitoring, if you like gadgets
This is optional, but some people enjoy turning their yard into a small project:
– Place low cost moisture sensors in the soil behind the wall to see how wet it gets after storms.
– Use outdoor cameras or time lapse images to check for visible movement over months or years.
– Track crack widths in concrete with simple calipers and a log.
Does everyone need that? No. But if you like data, it can be interesting and might even catch a slow issue in time to fix it cheaply.
Working with contractors without losing control of the design
Here is where I will gently disagree with a common assumption: many homeowners think anything outside is “simple labor” and they should just pick the lowest bid. For some tasks, maybe that works. For a retaining wall that protects your house or yard, it can be a bad approach.
Questions that separate thoughtful installers from guesswork
You do not need to ask fancy technical questions. Just listen for how they think.
Good questions to ask:
- How do you handle drainage behind the wall?
- What base material and depth do you typically use?
- Do you compact backfill, and if so, how?
- How do you design walls taller than 4 feet?
- Can you show photos of walls you built 3 to 5 years ago?
Pay attention to whether they talk about:
– Soil type and site conditions
– Local code rules and when engineering is needed
– Long term movement and how they reduce it
If the answers are vague or they dismiss drainage as “optional addition”, that is usually a sign to keep looking.
How much DIY makes sense
For low garden walls under 2 or 3 feet that are not near a structure, a careful DIYer can often build something that performs well. For taller walls, walls close to a foundation, or anything that has to support vehicles, it becomes more of a skilled trade plus engineering exercise.
I know the temptation to save money is strong, but a failed wall is not just ugly. It can:
– Damage nearby structures or fences
– Cause erosion and loss of usable yard
– Cost more to remove and rebuild than doing it right once
So a hybrid approach can make sense. Some people:
– Hire pros for design, base prep, and first few courses.
– Do simpler repetition work themselves after that.
– Or handle demo and cleanup themselves while leaving structure to pros.
It is not all or nothing unless you want it to be.
Common design mistakes that tech minded people can spot
Once you know what to watch for, you start seeing the same errors all over your neighborhood. It is a bit like noticing cable management once someone points it out.
Some frequent problems:
- No drainage pipe or gravel zone, just soil right up to the wall.
- Wall built straight up without any backward lean (batter).
- Base course sitting on topsoil instead of compacted stone.
- Timber walls with rotting posts and no barrier from soil.
- Tall walls with no visible signs of geogrid or stepped reinforcement.
- Water from downspouts directed right at the back of the wall.
Once you see those, you can design differently at your own place. It is not about judging other homes, more about quietly using their mistakes as a free lesson.
Balancing aesthetics, function, and budget without overcomplicating it
You can treat retaining wall design like any other small project: define constraints, then pick the best fit instead of chasing perfection.
Think in three columns:
| Category | Questions to Answer | Typical Choices |
|---|---|---|
| Function | How much soil and what loads must the wall support? | Height, single vs tiered, need for geogrid or engineering |
| Water | Where does stormwater come from and where will it go? | Drain pipe, gravel zone, grading, surface drains |
| Look & Feel | How should it match the house and yard over time? | Block pattern, color, stone vs concrete, timber for short term |
Start by being honest about function and water. Let aesthetics work within those constraints. If you swap that order, you tend to buy the wrong material first and then fight physics to make it behave.
Quick example: turning a steep Knoxville yard into a usable space
To make this less abstract, imagine a common case.
You have:
– A sloped backyard dropping 6 feet from house to fence.
– Clay soil that stays wet for a while after rain.
– A goal to create a flat play area and maybe a small patio.
A reasonable smart design path:
1. Decide to cut into the slope and build a main retaining wall about 4 feet high, with another 2 feet handled with grading above.
2. Choose segmental concrete block for balance of strength, cost, and looks.
3. Add a 12 to 18 inch gravel and drain zone behind the wall, with perforated pipe daylit at both ends.
4. Use geogrid layers at specified heights to stabilize the soil behind the wall.
5. Grade the top yard slightly away from the wall and direct gutter downspouts around the wall, not at it.
6. Leave enough space in front for access and planting to soften the look.
Now compare that to the shortcut version some people take:
– One row of big timbers on a rough trench.
– No gravel, no pipe, just soil piled behind.
– No real grading above.
The second costs less now, but in Knoxville weather, with clay and storms, that first design is far more likely to still work a decade later. You can disagree and go with the cheaper version, but then it is a conscious tradeoff, not an accident.
Ending with a practical question and answer
Question: If I live in Knoxville and want a retaining wall that feels “smartly” designed without overthinking everything, what is the shortest checklist I should follow?
Answer:
Keep it simple: respect the soil, plan for water, and pick a wall type that matches the load.
If you want a bit more structure, here is a short checklist you can keep in mind:
- Confirm soil type and how wet the area stays after storms.
- Decide if the wall is mostly cosmetic or if it has a real structural job.
- Stay under 4 feet unless you are ready for engineering help.
- Use compacted stone for the base and never build on topsoil.
- Give water a clear path out with gravel and a perforated drain pipe.
- Grade the surface so water does not rush at the back of the wall.
- Talk with at least one local contractor who can explain their approach in plain language.
If you can honestly say “yes” to each of those points, your retaining wall idea is probably more “smart design” than guesswork, and that already puts you ahead of a lot of projects in the ground right now.