I used to think robot vacuums were tiny wrecking balls for hardwood floors. Handy, yes, but secretly sanding away the finish every day.
Then I actually started testing them on real floors (and talking to flooring pros), and the story turned out to be more boring, more practical, and much less scary than the internet makes it sound.
The short answer: most modern robot vacuums are safe for hardwood floors if a few conditions are met. The wheels and brushes need to be in good condition, the robot must be kept reasonably clean, you need to avoid cheap, harsh-bristle models, and you should not let it drag hard debris (like small rocks or glass) across the surface. If your floor has a fragile finish or deep gaps, you might need extra care or a different cleaning strategy.
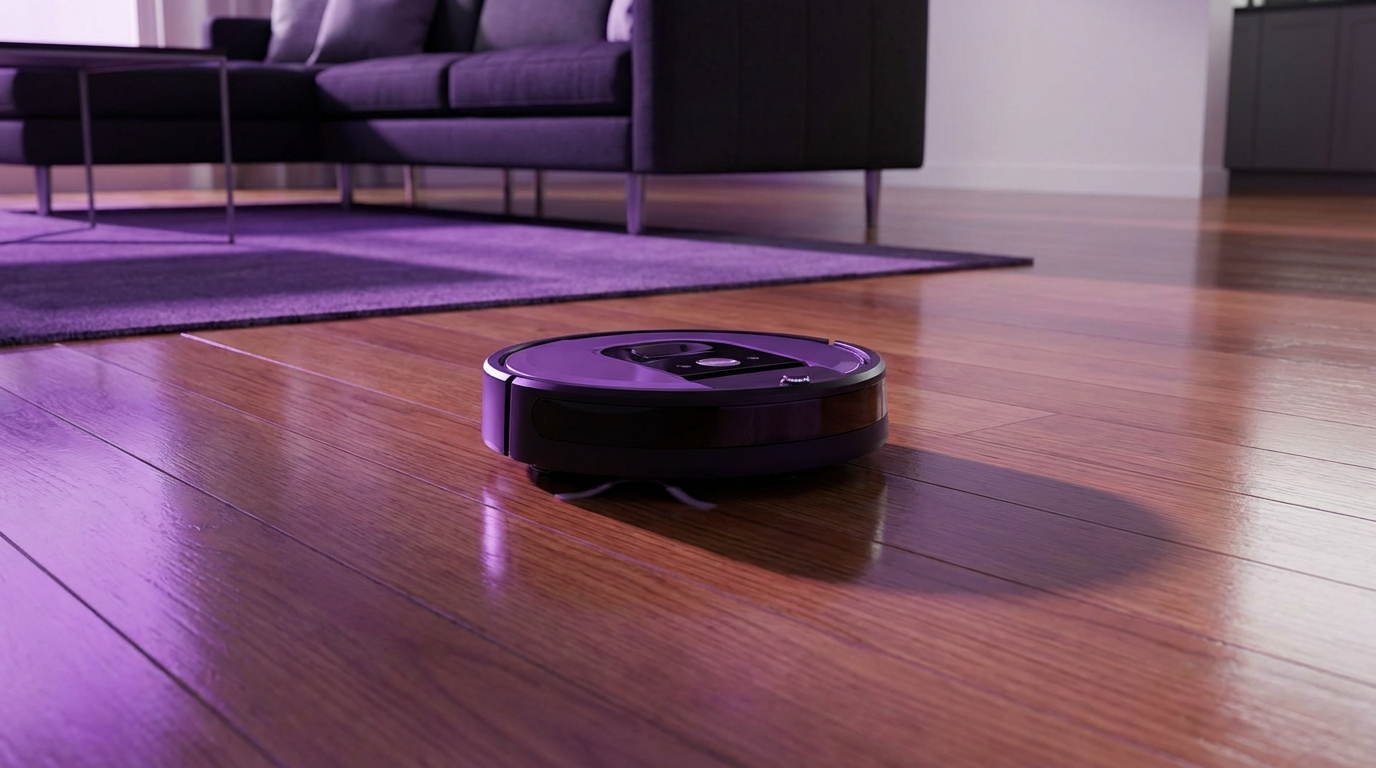
How robot vacuums actually touch your hardwood
Let us start with the simple mechanics, because once you see what is physically touching the wood, the fear drops a bit.
A robot vacuum usually has:
- Two large drive wheels (rubber or rubber-coated)
- One or more small caster wheels
- One or two side brushes near the edges
- A main brush roll (bristles, rubber fins, or a combo)
- Plastic shell and bumpers
Most of the time, only these parts are in contact with your floor:
| Part | Contact with floor | Scratch risk |
|---|---|---|
| Drive wheels | Rubber treads rolling along the surface | Low, unless debris is stuck or rubber is cracked |
| Caster wheel | Small hard or rubberized wheel swiveling | Medium if sand or grit packs into the swivel |
| Side brushes | Plastic/nylon bristles flicking dust inward | Usually low, but stiff bristles can be risky on soft finishes |
| Main brush | Bristles or rubber fins spinning over floor | Medium if bristles are stiff or embedded grit is present |
| Shell / bumper | Usually elevated, touches only during obstacles | Low, unless sharp edges or broken parts |
The biggest risk is not the robot itself. It is the combination of a spinning brush, hard debris, and a delicate finish.
Think of it like this: if you dragged a nylon toothbrush across your floor, nothing much would happen. If you trapped a tiny stone in those bristles and then pushed hard for 45 minutes, your finish might disagree. Robot vacuums do the same thing, but quietly and on a schedule.
Are robot vacuums “safe” on hardwood by type of floor?
Hardwood is not one thing. There are several types, and they react differently to friction, impact, and moisture.
1. Solid hardwood with modern factory finish
This is the more forgiving category: tongue-and-groove planks, prefinished, with a tough polyurethane or aluminum oxide topcoat.
For this group, a decent robot vacuum is usually fine if:
- You clean up grit often (or let the robot do that, which is the point)
- You avoid worn-out brushes with stiff, frayed bristles
- You keep wheels free from packed-in debris
On high quality prefinished hardwood, most surface scratches come from shoes and furniture, not from a reasonably maintained robot vacuum.
You might see micro-swirls in the finish over many years, but that also happens with manual broom and vacuum use.
2. Site-finished hardwood (especially older floors)
Older site-finished floors can be trickier:
- The finish might be thinner or uneven
- There may be small ridges, cupping, or gaps between boards
- There is a higher chance of soft spots or slightly exposed wood
Here, a robot vacuum can still be fine, but the risk is a bit higher if:
- The side brushes catch in gaps and drag grit
- The main brush rides over uneven boards and hits edges
- The robot’s wheels get stuck in low spots and spin
If your floor is very old, has flaking finish, or has exposed wood in traffic paths, I would be more cautious. You might want:
- A robot with a soft rubber or hybrid brush roll
- The “hard floor” mode if your model includes it
- Reduced suction / eco mode so the brush is less aggressive
3. Engineered hardwood
Engineered hardwood has a veneer of real wood on top of plywood or another core. The top layer is often thinner, but the surface finish behaves a lot like prefinished solid wood.
Robot vacuums usually perform very well here, with similar conditions to modern solid hardwood. The only extra concern:
- Deep dents or chipped edges in the veneer can give grit a place to sit, which the robot can then grind over.
If the veneer is very thin and already damaged, consider spot-cleaning those areas by hand and setting no-go zones for the robot.
4. Oiled hardwood (penetrating oil finishes)
Oiled floors often look beautiful and natural, but they are less protected at the surface.
These floors:
- Show scratches more quickly
- May have more texture or open grain
- Often need more frequent maintenance and re-oiling
A soft-brush or rubber-brush robot can still work, but you have to be more disciplined about:
- Removing small stones and sand near entryways
- Checking the robot’s brushes and wheels for embedded grit
- Monitoring high traffic zones for visible micro-scratches
If you are already babying your oiled floor, treat the robot like another tool that needs to follow the same house rules.
Key risks: how robot vacuums damage hardwood floors
There are a few repeat patterns with floor damage and robots. If you can control these, you lower almost all the risk.
1. Grit and sand acting like sandpaper
This is the main issue. Not the robot itself, but what it might drag across the surface.
The worst offenders:
- Sand by entry doors
- Crumbling grout or concrete dust near renovations
- Small stones, glass slivers, metal shavings
If the robot’s wheels or brush pick up these particles and grind them in a circular pattern, you can get dull patches or swirl lines.
Practical steps:
- Use mats at doors and actually clean them
- During or after any construction, run a regular vacuum first, then the robot
- Check the brush roll weekly if you live with a lot of outdoor grit
2. Hard plastic or stiff bristles scraping the finish
Some older or cheaper robots have:
- Very stiff nylon or plastic bristles
- Hard plastic side brushes without much give
- Exposed hard plastic guards near the brush roll
On a delicate finish, over months and years, this friction can create a cloudy look or visible scratch paths, especially if the robot follows similar routes each time.
If you can feel the bristles and they feel as stiff as a scrub brush, they are probably too harsh for a fragile or soft finish.
Look for:
- Soft bristles or mixed rubber + bristle designs
- All-rubber brush rolls on some brands, which are kinder to hard floors
3. Stuck wheels and repeated spinning
If a robot gets caught on a cable, rug edge, or floor transition, its wheels might spin in place for a few seconds.
On hardwood, that can mean:
- Rubber leaving light marks
- One spot experiencing more friction and heat
Usually, this shows up as scuffing rather than deep gouges. You can often buff that out gently with the right cleaner. But if there is grit under the wheel, that is where deeper scratches can appear.
Prevention:
- Secure loose cables and threshold strips
- Fold or remove thin rug corners that flip up
- Use no-go zones or physical barriers around problem spots
4. Liquids and robot mop modes
Vacuum-only robots are one story. Vacuum-plus-mop robots are a bit different, especially on hardwood.
Potential problems:
- Too much water sitting on the finish
- Leaking water tanks when the robot is parked
- Mop pads dragging damp grit across the wood
Real hardwood (especially site finished and oiled) does not like prolonged moisture. Engineered hardwood sometimes tolerates shallow moisture better, but the joints and core are still vulnerable.
If you use a mopping robot on hardwood:
- Set the lowest water level or “damp” mode
- Do not let the robot sit with a full tank on the dock on hardwood; place the dock on tile if possible
- Wash mop pads frequently, since dirty pads can work like wet sandpaper
Water damage to hardwood is usually slower and more expensive to fix than light surface scratching.
How to choose a robot vacuum that is safer for hardwood
Not every robot is designed with hardwood in mind. The marketing sometimes says so, but the hardware tells another story.
Here is what I would actually look for.
1. Brush design: soft is better
Focus on the main brush:
- Rubber brush or rubber + bristle combo: kinder on finishes, less likely to trap grit deep in stiff bristles.
- All-bristle brushes: fine if bristles are soft and flexible, less ideal if they are thick and stiff.
- Low-profile brush housing: reduces the chance of hard plastic scraping ridges or transitions.
For side brushes:
- Look for multiple thin, flexible filaments rather than sparse, thick plastic prongs.
2. Floor type settings
Many mid-range and higher robots let you choose or auto-detect floor types.
For hardwood, features that help:
- Hard floor mode: often runs the brush and suction more gently.
- Suction level control: lower suction can mean less forceful brushing.
- No-mop zones if it has a water tank.
You do not need the most expensive model, but you do want some control. A single, high-power “carpet attack” mode that runs everywhere is not ideal for wood.
3. Navigation and mapping
This sounds like a tech preference topic, but for floors, it matters.
Robots that wander randomly:
- Pass over some spots many times
- Bang into baseboards and furniture more often
Robots with mapping and careful navigation:
- Follow more predictable paths
- Let you set no-go lines around fragile areas, cords, uneven transitions
Less bumping, fewer tight spin-in-place events, less grinding on the same path day after day.
4. Ground clearance and bumper design
Look at the physical design photos, not just the specs.
Good signs:
- A slightly raised plastic shell that does not drag on the floor
- Soft, wide bumpers around the front edge
- No sharp edges or screws protruding near the bottom perimeter
This reduces the chance that the robot will scrape baseboards or stair nosings while turning.
5. Brand track record with hardwood users
User reviews are not perfect, but they tell patterns. When I read them for this topic, I pay attention to:
- Mentions of “scuffs” or “scratches” tied to hardwood
- Comments from owners with older floors or matte finishes
- Long term usage reviews, not just “had it for 3 days and it is great”
If many hardwood owners say a model feels gentle, that pattern is more useful than a single glowing or angry review.
Daily and weekly habits that protect your hardwood
The robot and the floor are only part of the equation. Your maintenance habits are the other half.
1. Keep the robot itself clean
Think of the robot as a cleaning tool that also needs cleaning.
Weekly (or more often if your home is dusty or you have pets):
- Remove the main brush and inspect it under bright light
- Pick out small stones, glass, or hard chunks from the bristles or rubber fins
- Spin the wheels by hand and wipe them with a slightly damp cloth
- Check around the caster wheel; grit often hides there
Monthly:
- Inspect the underside plastics for cracks or sharp chips
- Make sure no screws have started to stick out of their housings
If you ignore this, a single lodged stone can undo a lot of caution.
2. Control the worst debris before the robot runs
A robot vacuum excels at dust, pet hair, and light debris. It is not a construction cleanup tool.
Before a scheduled run, especially in risky contexts:
- Do a quick visual sweep of entryways for stones or larger debris
- Pick up broken glass or other sharp fragments by hand or with a regular vacuum
- Fold rug corners under if they tend to flip
If your robot supports zones or room selection, start with:
- Less gritty areas (bedrooms, living rooms) daily
- More gritty areas (entry halls, mudrooms) after quick manual checks
3. Choose a sensible schedule
Counterintuitively, running the robot more often can be gentler on your floors.
Reason: frequent runs mean each session has less grit to handle. The brushes are mostly moving over dust and hair, not piles of sand.
That said, if your home brings in construction dust or heavy outdoor debris daily, you might:
- Run it every day in low-risk rooms
- Run it a few times a week near entry doors after hand checking
Dealing with existing scratches and damage
Let me be direct: if you already see scratches, there is no magic content trick here. You need to identify the cause and treat the floor.
1. Are the scratches from the robot or something else?
Common non-robot causes:
- Chairs without felt pads
- High heels or stones stuck in shoe treads
- Dragging furniture
- Pets with long nails
Clues that point to the robot:
- Curved or looping patterns that mirror your robot’s path
- Scuffs concentrated around docking station or snag-prone spots
- Marks that align with the width of its brush or wheel track
Before blaming the robot, track where the scratches actually are and when they appeared.
Sometimes it is a mix: robot passes over grit that came from shoes or pets.
2. Light surface scuffs vs deeper scratches
Light scuffs:
- Often in the finish layer only
- Feel smooth to the touch
- Might buff out with appropriate floor cleaner or polish (if your flooring manufacturer allows that)
Deeper scratches:
- You can feel them with a fingernail
- May go through the finish into the wood layer
- Usually require professional repair, filling, or refinishing
Before you continue using the robot, fix the root problem: usually grit sources or a damaged brush/wheel.
3. When to pause or retire the robot for hardwood
I do not think most people need to stop using robot vacuums on hardwood. But there are some edge cases where it makes sense:
- Your floor has deep gaps and splintering edges that catch the brushes
- You have an older robot with very stiff brushes and no way to adjust behavior
- You keep seeing new, distinct scratch patterns that match its path even after maintenance
In those cases, manual vacuuming with a soft parquet head may simply be safer until the floor is refinished or you upgrade to a more gentle robot.
Robot mops vs hardwood: extra caution
Vacuum-only is one question. Adding water changes it.
1. Types of robot mops
Broadly, you have:
- Vacuum + drag mop pad: a damp pad trails behind the vacuum unit.
- Dedicated mopping robots: usually with water jets or vibrating pads.
- Combo stations: vacuum, mop, and sometimes wash their own pads.
For hardwood, the main concerns do not change:
- Limit water exposure
- Do not let standing water sit in cracks or between boards
- Keep pads as clean as possible
2. Safer practices for mopping hardwood
If your floor manufacturer says “no water”, follow that. For more resilient finishes that allow damp mopping:
- Use the lowest water setting
- Set short mopping runs so the floor dries quickly
- Avoid running the mop over open seams, gaps, or damaged boards
- Do not let a wet robot park on wood; use a tray or tile area
If you would not be comfortable leaving a wet cloth on that spot for 20 minutes, do not let a roaming robot mop soak it either.
Where robot vacuums shine with hardwood floors
I have been harsh on the risks so far, but there is a reason people stay with these devices.
1. Reducing the daily dust and grit load
Counter to the fear, a robot vacuum can actually protect your hardwood finish over time by:
- Removing fine grit before it gets pressed under shoes
- Keeping pet hair and dander from forming sticky, abrasive films
- Encouraging you to pick up clutter (since it will eat cables otherwise)
Less grit means less unintentional sanding from everyday traffic.
2. Reaching under furniture without dragging it
Dragging heavy furniture across hardwood to clean underneath is one of the easiest ways to cause deep scratches.
A low-profile robot can:
- Clean under couches and beds regularly
- Reduce how often you need to move big items
In a way, that convenience can extend the life of your finish in those hidden zones.
3. Consistent maintenance vs “weekend cleaning sprints”
Most people do not vacuum every day by hand. A robot lets you keep floors consistently cleaner with small, frequent passes.
This rhythm is kinder to most finishes than occasional deep cleans that involve heavier pressure and more aggressive scrubbing.
Practical setup checklist for robot + hardwood
If you want a quick, grounded setup path, this is what I would do with a hardwood-heavy home.
Before buying
- Identify your floor type: prefinished, site-finished, engineered, oiled.
- Decide if you really need mopping or if vacuum-only is enough.
- Look for a model with:
- Soft or rubber main brush
- Floor-specific modes and suction control
- Good mapping and no-go zone features
During setup
- Place the dock on tile or on a small mat that protects the wood.
- Set no-go lines around:
- Areas with loose boards or gaps
- Wobbly thresholds
- Cable clusters or power strips
- Start with a lower suction or “quiet” mode on hardwood and see if cleaning is adequate.
First weeks of use
- Inspect the floor after the first few runs, especially in doorways and narrow corridors.
- Check the robot’s brushes and wheels for any embedded grit.
- Adjust scheduling: daily in low-risk rooms, a bit less near entrances if grit is heavy.
Ongoing
- Weekly:
- Clean brush roll and wheels
- Empty the bin, check filters
- Monthly:
- Inspect for any cracks or sharp edges underneath
- Review your no-go zones based on any near-miss incidents
- Yearly:
- Replace brushes according to the manufacturer’s schedule, sooner if bristles feel stiff or frayed
Treat the robot like a moving cleaning head that lives on your floor. If you would not ignore your manual vacuum head for years, do not ignore this either.
When a robot vacuum is the wrong choice for your hardwood
I do not want to pretend that a robot is always the correct answer. There are clear edge cases.
1. Very fragile or historically significant floors
If you have:
- Antique hardwood with original finish you want to preserve
- Heavily worn, uneven boards with exposed grain
- Wax-only finishes that react badly to friction and heat
Then any automated device that runs unsupervised is a risk. In such cases:
- Use a very soft dust mop
- Use a canister vacuum with a dedicated, gentle hard floor head
- Avoid spinning brush rolls entirely on the fragile areas
2. Environments with constant heavy grit
If you live on a beach and bring in sand all day, or you run a workshop that opens directly onto hardwood, a robot might struggle.
In those cases:
- Frequent manual vacuuming with a strong, gentle hard-floor head might be safer
- Dedicated entry rugs and strict shoe rules help more than any robot can
3. You do not want to maintain the robot
If you know you will never flip the robot over, never clean its brush, and never check its wheels, then you are relying fully on luck.
That might be fine for tile. For hardwood, that is risky. A low effort alternative:
- A simple, non-spinning hard floor vacuum head that you pull out twice a week
It is less tech-friendly, but it also has fewer moving parts that can grind grit into your wood.
So, are robot vacuums safe for hardwood floors?
They can be, and in many homes they actually help extend the life of the finish by staying on top of dust and grit. But safety is not guaranteed by the word “hard floor” on the box.
It comes down to a few practical truths:
- The robot must have a gentle enough brush and wheel design.
- Your hardwood finish must be in decent condition.
- You need to keep both the floor and the robot reasonably free of sharp debris.
- You should use features like no-go zones and low-power modes with some thought.
If you want to connect this with your flooring decisions, one smart move is to talk with your flooring supplier or installer before you buy a robot. Ask how your specific finish tolerates friction, what they recommend for cleaning heads, and whether they see any warranty issues with robot use.
Then pick a robot that behaves as close as possible to what they describe: soft contact, controlled movement, and not too much moisture.